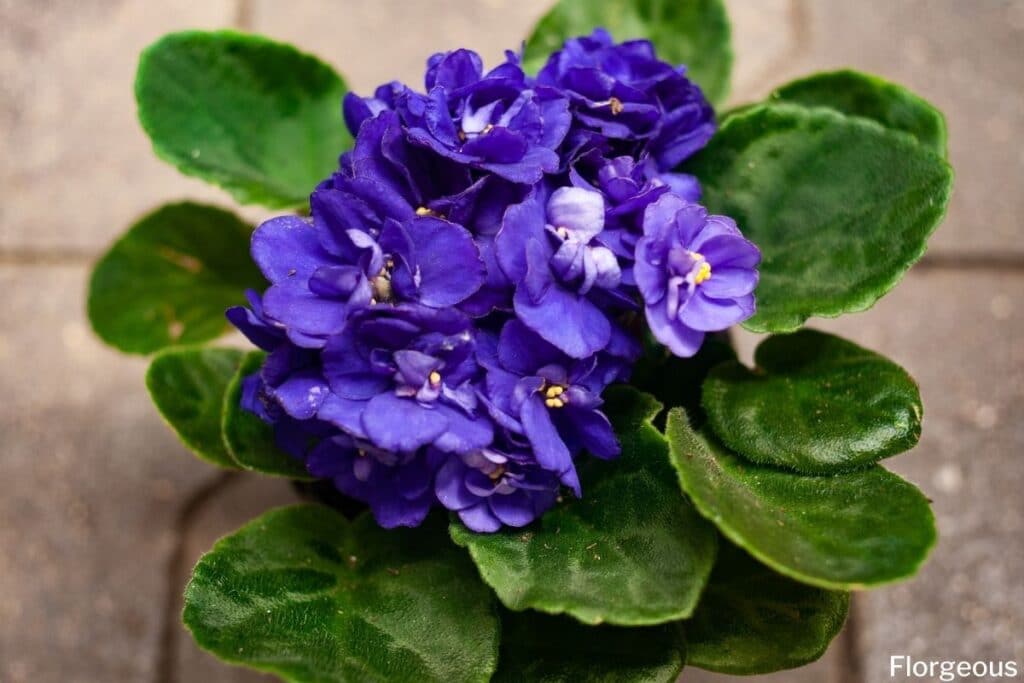
Household plants make any room feel lighter and more relaxing. Having said that, the African violet (Saintpaulia) is a top-tier houseplant as it gives texture and color to the room. If only you could put it in every room, you would.
If the only thing stopping you is the lack of availability, having more Saintpaulia plants from one mother plant is the way to go. Caring for African violets is not difficult because this gorgeous plant is easy to maintain, grow, and propagate.
Here are the effective ways you can propagate an African Violet.
Effective Propagation Methods for African Violets
Remember that for each method, patience and practice are constants. Understand and learn different ways by trying them out.
Sowing African Violet Seeds
Sowing seeds of African violets will take a significantly longer time to produce an established plant. However, it is still a viable option.
The first thing to do is prepare the growing medium. Make sure that the soil is light and porous. For a more porous texture, Epsom salt may be added to the mix. Fill ¾ of the pot with the growing medium. Then, sow the seeds and cover them with a thin layer of mixture.
Put the pots in a warm and partially shaded area. A room temperature of around 18 to 25 degrees Celsius is best suitable for germination. Apply drizzles of water once or twice a week. Remember to avoid overwatering because this will inhibit germination. After 1 to 2 weeks, germination should occur.
Planting African Violet Leaf Cuttings
If you choose to do leaf cuttings, here are the things you’ll need: a mature and healthy Saintpaulia plant, a small pot or container, an African violet soil mixture, and a sharp knife, pen, and label. The first thing to do is to select a parent leaf that is neither too old nor too young.
Make sure that it is in its actively growing stage to develop roots in a short time. Pinch the mother leaf stem (petiole) near the nodes to detach the leaf. Then, cut the petioles at a smooth 45-degree angle, leaving at least half an inch of petiole attached to the leaf blade.
Fill ¾ of the pot with the growing mixture. Stick the leaf directly to the moist potting soil by lightly pushing the petiole down the ground. To make sure that the leaf is erect, add more soil surrounding the petiole, but do not cover until the base of the leaf. Remember to leave some space between the leaf and the topsoil.
Place the leaf cutting in a bright place with partial shade. Also, water them weekly or when the soil is dry. With thorough care, the plant will significantly grow after few weeks. By the 4th or 6th month, plantlets are sturdy enough to be divided and transplanted.
OPTIONAL: Use rooting hormone for faster root development. Also, labeling is optional but beneficial for people propagating African violets in more than one variety.
Dividing African Violet Plants
In dividing African violets, you can opt to use the plantlets from cuttings or the sprouts from the mother plant. In either case, most steps are the same. Separating plantlets is more efficient because their roots are not that vast yet.
Carefully uproot the plantlets from leaf cuttings and remove excess soil. This step will allow you to see the root system more clearly. Gently detangle the tiny roots and separate the baby plants.
If you are using suckers from the mother plant, the same procedure is done. However, the detangling of roots is a bit more complicated.
Start by loosening the soil on the pot and uprooting the plant. Dust off the soil by lightly shaking the bottom part. If there is still more soil in between the roots, remove it using water.
Once you have a clear view of the African violet’s roots, identify the main roots for each sucker and start detangling. In doing this step, there might be some roots that will be damaged. It is okay as long as the main roots of the suckers are intact.
Plant the separated suckers and plantlets into pots that are appropriate for their size. Fill half of the pot with the african violet mix and place the sucker or plantlet in the middle. While holding the plantlet upright, fill the pot with more soil until all the roots are covered. Follow the appropriate care pointers for Saintpaulia.
FAQs
Is it better to propagate African violets in water or soil?
African violets can be propagated successfully in both water and soil, but some gardeners prefer soil propagation as it may lead to more robust root development and adaptation to soil conditions.
How long does it take a African violet cutting to root in water?
African violet cuttings typically root in water within 2 to 6 weeks, depending on various factors such as the health of the cutting, environmental conditions, and the presence of rooting hormones.
Do African violets multiply?
African violets can multiply through various methods, including division of offsets, leaf cuttings, or suckers. With proper care and propagation techniques, African violets can quickly multiply and produce new plants.
What makes an African violet grow straight up?
African violets grow straight up when they receive adequate light and are regularly rotated to ensure even plant growth on all sides. Providing sufficient light from a source such as a south-facing window or grow lights helps promote upright growth. Additionally, avoiding overcrowding and maintaining proper spacing between plants can also encourage straighter growth.