Do you want to repot a bonsai tree for the very first time? This can be a stressful task, especially if you already poured much time, love, and effort into growing your little tree.
All bonsai trees will eventually need to be repotted because it is essential for keeping your tree healthy.
If bonsai plants are never repotted, they will become diseased and sickly. If the root system takes up too much space, the soil won’t be able to drain properly, which may result in fungal diseases or root rot. The old soil will also become deprived of nutrients, and the tree won’t have enough energy to grow healthy.
If you want to grow a healthy tree, it is best to learn how to repot a bonsai tree, and in this growing guide, we will show you exactly how to safely accomplish this while keeping damage to your tree to a bare minimum.
How Often Should I Repot a Bonsai?
The frequency with which you repot a bonsai tree depends on the tree species and the size of the container.
Fast-growing trees typically require repotting every one to two years because they can quickly outgrow their container or deplete the nutrients in the soil.
Mature trees can be repotted less often since they grow less rapidly now. These trees usually require repotting every three to five years.
Succulents or other drought-tolerant species that flourish in harsh conditions can also be kept in the same container for much longer since they usually don’t like soil with excessive nutrients.
Bonsai enthusiasts will advise you not to repot bonsai trees on a routine or a strict schedule. This maintenance task can be stressful to the tree and should only be done when necessary. This is usually when the root growth has taken up too much space or the plant has become too pot-bound.
How To Tell If The Roots Have Overgrown the Container
Tree roots grow underground, making it difficult to see whether all the roots are still healthy or if the root system has become too overgrown for the container. There are several ways to tell when your tree’s roots have become too large or vigorous for the container. Here are some of the signs that it might be time to repot.
Check for a Risen Root Ball
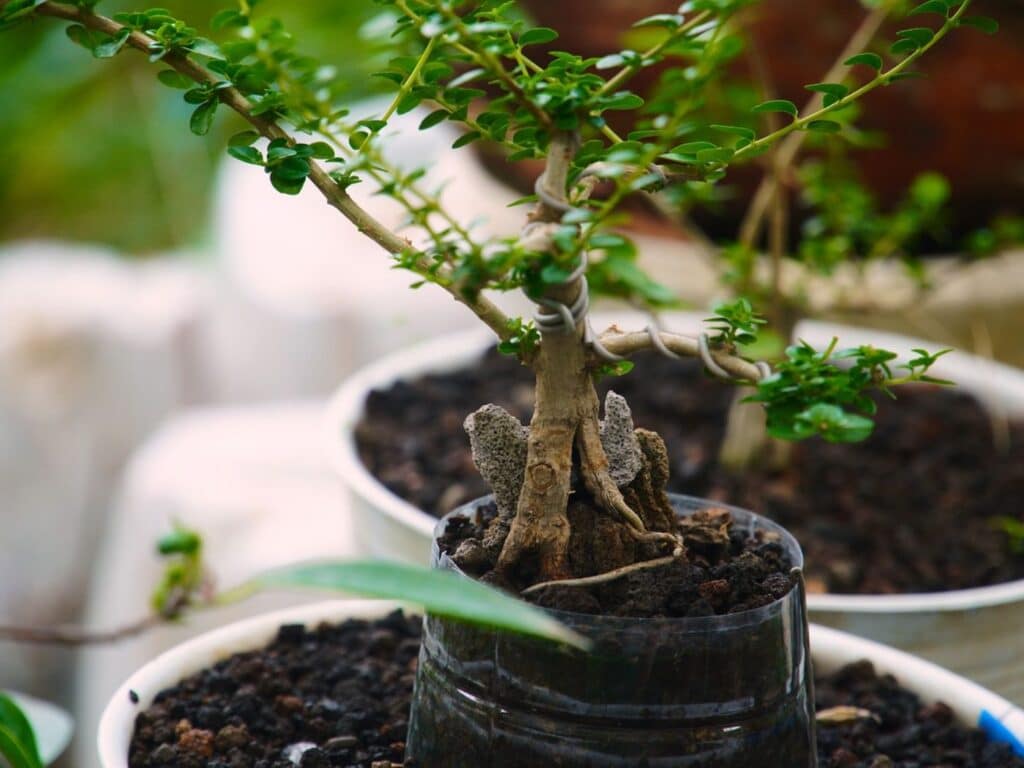
You can carefully lift the bonsai tree out of the container and check the base of the root system. If the roots circle in the base, it usually means that there are too many roots for the small container, and the bonsai plant must be pruned.
Check for a Circling Root System
You can carefully lift the bonsai tree out of the container and check the base of the root system. If the roots circle around in the base, it usually means that there are too many roots for the small container and the bonsai plant will need to be pruned.
When to Repot a Bonsai Tree
It is usually best to repot bonsai trees before the growing season begins while the tree is still dormant. For most tree species this is in early spring.
Repotting is mostly done in early spring right before the growing season because this will keep the damage to the tree to a bare minimum. The tree hasn’t produced quite as much foliage yet which means foliage and energy loss will be minimized.
When the growing season begins, the tree will naturally kick into action and start growing. This will help the root system to repair quicker.
There are some evergreen tree species that can be repotted during the autumn season but the roots of a bonsai should never be disturbed during summer or winter.
If the tree is repotted while it is already in its growing season it will likely shed all of its foliage, flowers, and fruits. This may deprive the tree of energy and it might show little growth during the growing season or it could have a tough time recovering before autumn.
Repotting during the cold winter also isn’t an option since most species grow slowly during this season and will take a lot longer to recover – if they recover at all.
Equipment Required for Repotting Bonsai Trees
It is very important to properly prepare before extracting the plant from its container. Bonsai trees don’t like to have their roots exposed for too long. The repotting and root pruning process should be handled as swiftly and carefully as possible or the root ball can dry out and sustain damage.
You should already have everything ready before removing the little tree from its container. Let’s take a quick look at everything that should be ready at hand before you start.
Bonsai Pot
Bonsai pots come in all shapes, colors, styles, and sizes and all of these elements can have a huge impact on the health of your tree and the overall appearance of your bonsai. Here are a couple of tips to help you find a suitable container.
Materials
Bonsai pots can be made from a number of materials like ceramic, concrete, ceramic, porcelain, or plastic.
Plastic pots can be a good budget option for young trees that are bound to grow a lot or that might not have a distinctive shape just yet.
For mature trees, it is better to start looking for a ceramic or concrete pot with a stylish appearance since this can greatly enhance the overall aesthetics of your little tree.
If you want a more authentic bonsai effect then it is best to look for a ceramic or porcelain pot that is stoneware burned. These materials won’t hold any water or absorb any materials and are considered the healthiest for your little tree.
Size, Depth, and Shape
Most bonsai trees are planted in a flattened container but there are some acceptations. A deeper container might be more suitable for trees with a deeper or more vertical root system or for cascade (Kengai) or semi-cascade (Han-kengai) bonsai shapes.
A general rule of thumb is that the pot’s depth should be equal to the diameter of the tree trunk. For oval trees, the pot length is usually about two-thirds of the height of the tree. For round pots, the diameter is usually one-third of the height of the tree.
Personal preference and the style or appearance of your tree can, however, play a huge role in the pot you might select. Some bonsai artists like to include additional accessories like rocks, boulders, dead tree trunks, moss, and other ornaments in their display. In these cases, a bigger container might be better.
Drainage Holes
One of the most critical factors of a bonsai pot is drainage holes. If the container doesn’t doesn’t drain properly, the tree can develop root rot and it will likely die within a few months or even weeks.
Design
Bonsai pots vary a lot in design. Classical bonsai pots are usually particularly shaped with small footstands at the base of the pot. These countries can be simple in their design or highly decorative.
Bonsai enthusiasts also like to get creative with container designs. It is very common to see bonsai trees in unique hand-made containers with very interesting shapes since this can give the tree a lot more character.
Mesh
The drainage holes of bonsai pots can sometimes be a bit large and the soil matter can easily flush out through these holes. To keep the soil secure inside your container, it is usually best to line the base or the area over the drainage holes with a mesh layer. The mesh will prevent the loss of medium and will keep air pockets from developing around the tree’s roots.
Soil Mix
Bonsai soils are carefully mixed to provide the tree with sufficient nutrients, moisture, and air. The soil should also include components that will keep the soil loose enough to allow water to drain properly.
Most bonsai trees are planted in standard bonsai soil mixes. This usually includes Akadama (baked clay) organic compost, lava rocks, and fine gravel.
If you are uncertain about the type of soil to use for your tree then it is always best to simply use a standard bonsai soil mix.
For trees with more specific growing requirements, it might be best to create a custom soil mix. The soil components can also be modified to accommodate the growing needs of your tree species. For example, tropical trees might require soil with more water retention while succulent bonsai tend to grow better in poorer soil conditions.
Adding a little bit more peat moss to your soil can increase its water-retentive abilities while less peat moss and more gravel or Akadama might enhance aeration and drainage.
Bonsai Tools
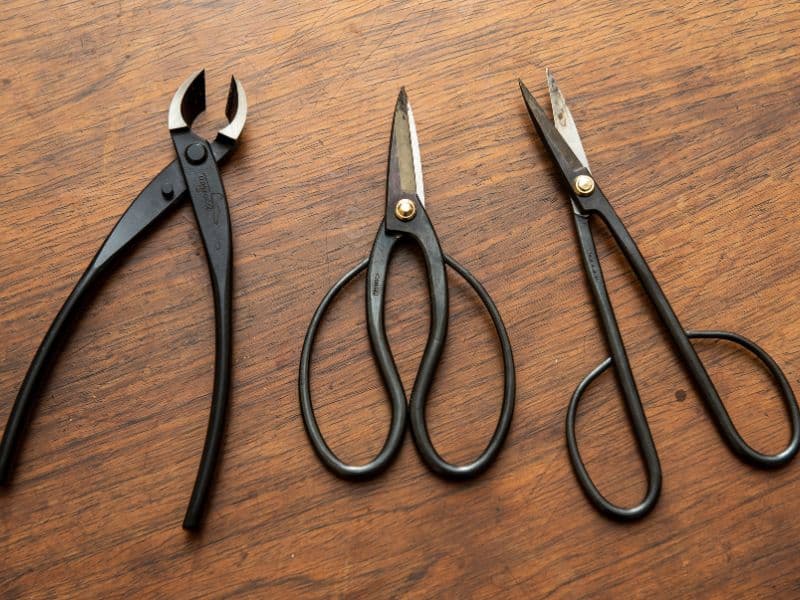
The right bonsai tools will make it much easier to get your tree out of its old container and to prune and trim the roots. For repotting, it is usually best to have a little root rake close by so you can loosen up the root mass around the tree before pruning.
Sharp shears are required for pruning the roots and a little shovel might be helpful for digging out and filling up the bonsai pot again. If your bonsai is bound or anchored to the pot then you will also need a cut wire to loosen up the tree.
How to Repot a Bonsai Tree
You can only start repotting your bonsai tree when you have all the tools and equipment ready. Give your hands a good wash and clean the cutting shears and root rake because we are about to share the best steps for repotting your bonsai plant.
Step 1
First, you will need to prepare the new bonsai pot for planting. If you are reusing the old pot then this step should be completed after removing the tree.
Take the mesh and cut it into a suitable size so it will cover the entire drainage hole. This will keep the potting soil from flushing out of the container during watering. You can use aluminum or copper wire to secure the pieces of mesh over the drainage holes.
If you are planning on anchoring the tree to the container then you should also string a wire between the drainage holes with some additional wire extending upwards out of the pot. This wire can be used to stabilize the tree after pruning and to anchor it to the base of the pot.
You can now add a thin layer of heavy-grain soil to the container. It is best to use drainage materials like lava rock, grit, or Akadama at the base of the container. This base drainage layer should be followed by a layer of bonsai soil.
Step 2
Lift the bonsai and check the base for an anchor wire. Bonsai trees are often pot-bound to keep them from topping over if the foliage pattern is top-heavy compared to the roots that anchor the tree to the ground. Any wires running along the base of the pot should be clipped off so you can easily free the tree from its container.
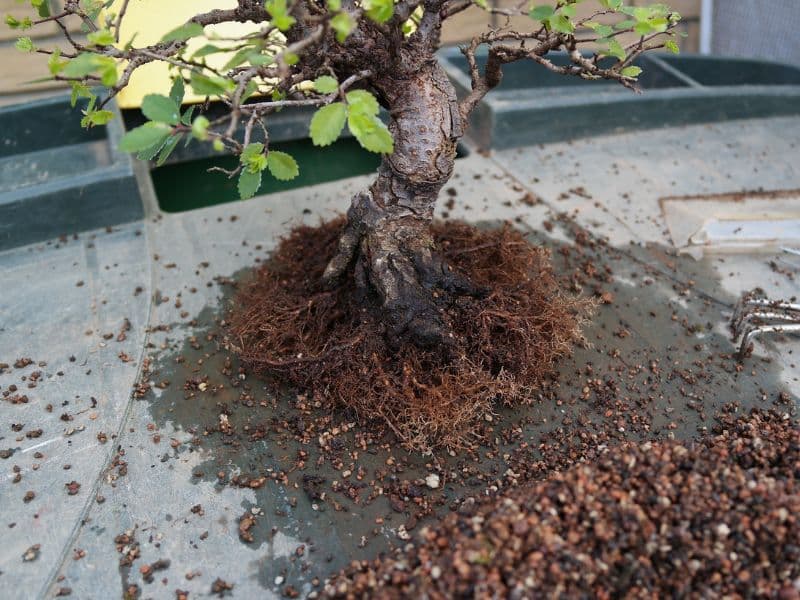
Carefully lift the bonsai tree from the old pot with the help of your root rake or root hook.
Step 3
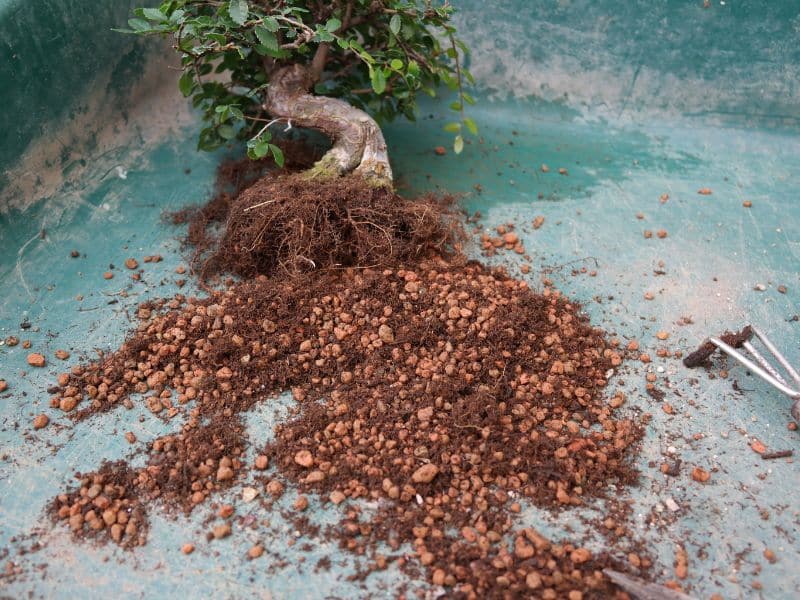
Use the root rake or a chopstick to remove the old soil from the sides and bottom of the tree. Work carefully to avoid damage to the root system.
Step 4
Use scissors or cutting shears to cut away any damaged or diseased roots. If the plant has a lot of root growth, the roots can also be pruned. Most bonsai artists will try to remove about one-third of the roots. It is, however, important to never cut away more than 30% of the root system because this will make it hard for the tree to recover and your tree won’t be able to stay balanced in the pot.
Step 5
Replant the tree and use the anchor wires to secure your little plant into place. Add more plant medium around the tree and be careful to fill out any air pockets around the roots.
Step 6
After planting the tree, you should thoroughly water the plant. It is wise to keep the soil moist for a few days after planting and to decrease watering while the tree roots recover gradually. A healthy tree should sprout some new growth after just a week of transplanting and look healthy and vigorous after about two weeks.
Conclusion
Repotting a bonsai tree isn’t too tricky. Still, it is a maintenance task that shouldn’t be done unnecessarily or too often because this invasive technique can be quite stressful to a mini bonsai tree.
We hope you enjoyed this repotting guide and wish you all the best when you decide to take on this challenging task. If you repot at the right time, use a suitable soil mixture, and are careful not to trim back too much of the tender new root growth, then we are sure that your newly potted tree will do very well and recover quickly.
Up next: