Imagine stepping into your garden to find it transformed into a tropical paradise, with the enchanting fragrance of plumeria flowers wafting through the air.
Growing plumeria from cuttings is a simple yet rewarding journey that can turn this dream into reality. This method not only saves you time compared to growing from seeds but also allows you to replicate the exact beauty of a parent plant.
Starting your plumeria propagation may well seem daunting, but with the right guidance, you’ll find it’s quite straightforward. Whether you’re a seasoned gardener looking to expand your collection or a beginner eager to add a touch of the tropics to your space, this guide is designed to help you succeed.
Let’s embark on this fragrant adventure together, turning a simple cutting into a flourishing plumeria plant that becomes the highlight of your garden.
Why Grow Plumeria from Cuttings?
The Benefits of Propagation
Growing plumeria from cuttings offers a fast track to achieving a blooming garden. This method allows you to bypass the slow germination and growth period typical of seed-grown plants. By using a cutting from an existing plumeria, you clone the plant, ensuring the offspring will mirror the parent’s flowers in color and form.
This approach guarantees that the vibrant hues and intoxicating fragrance of your chosen specimen will grace your garden. Additionally, propagation from cuttings is cost-effective and reduces the need for purchasing new plants.
Time to Maturity and Blooming
Starting plumeria from cuttings not only saves money but also time. Cuttings reach maturity and begin blooming faster than seedlings, often within a year of planting. This rapid journey to blooming is particularly appealing for gardeners eager to see their efforts come to fruition.
Additionally, this method eliminates the guesswork involved in seed propagation, where variations in offspring can lead to unexpected results. With cuttings, you get a head start, enjoying the beauty and fragrance of plumeria blossoms in less time.
Choosing the Right Cuttings
What to Look for in a Healthy Cutting
Selecting a healthy plumeria cutting is like picking the perfect avocado – it’s all about the feel and look. Ensure the cutting is about 12 to 18 inches long; this size is ideal for rooting. It should feel firm, not squishy, indicating it’s hydrated and free from rot.
The skin, or bark, needs to be smooth and free of scars or pests. If the cutting passes these checks, congratulations, you’ve found a winner! The better the cutting, the higher your chances of growing a plumeria that’s as stunning as the one you admired.
Preparing for Planting
Tools and Materials Needed
Before diving into the exciting process of growing your plumeria, you’ll need to gather a few essential tools and materials.
First, ensure you have a sharp, clean knife or pruning shears for making a precise cut on the plumeria cutting. A clean cut is crucial for promoting healthy growth.
Secondly, you’ll need rooting hormone to encourage root development, providing your cutting with a strong start.
Lastly, grab a pot with drainage holes and lightweight, well-draining potting mix to create the perfect home for your new plumeria cutting.
The Right Soil Mix for Plumeria
Choosing the correct soil mix for your plumeria is like finding the perfect bed for a long nap; it’s got to be just right. For plumerias, the ideal mix drains well yet retains enough moisture to keep the roots hydrated.
Aim for a mixture of two parts perlite to one part peat, or use a commercial cactus mix. This ensures your plumeria doesn’t sit in water, which can lead to root rot, the nemesis of healthy growth.
Treating the Cutting Before Planting
Before planting plumeria, your plumeria cutting needs a little spa treatment to prep it for rooting. Start by letting the cut end dry and callous over for about a week. This step is like letting a wound heal before jumping back into action.
After the cut end has dried, dip it into rooting hormone powder. This helps kick-start root growth, giving your plumeria the boost it needs to establish itself.
Remember, patience is key during this stage. After treating, your cutting is ready to plant and embark on its journey to becoming a beautiful, blooming plumeria.
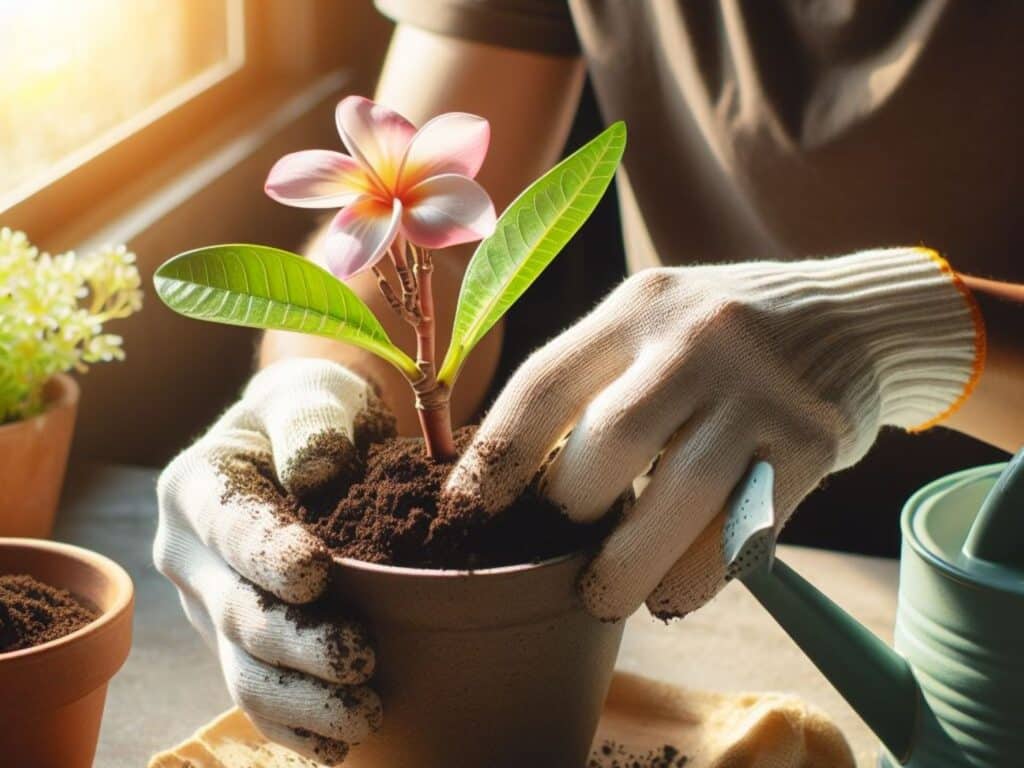
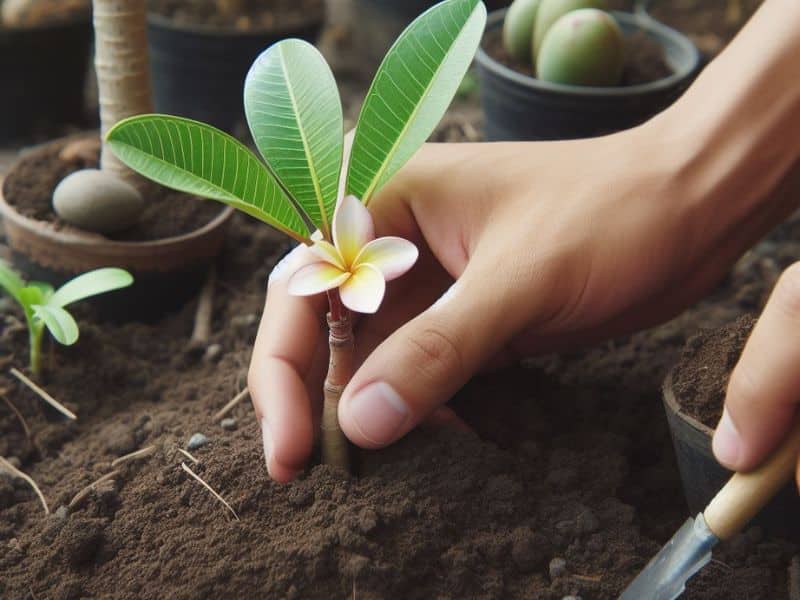
Planting Your Plumeria Cutting
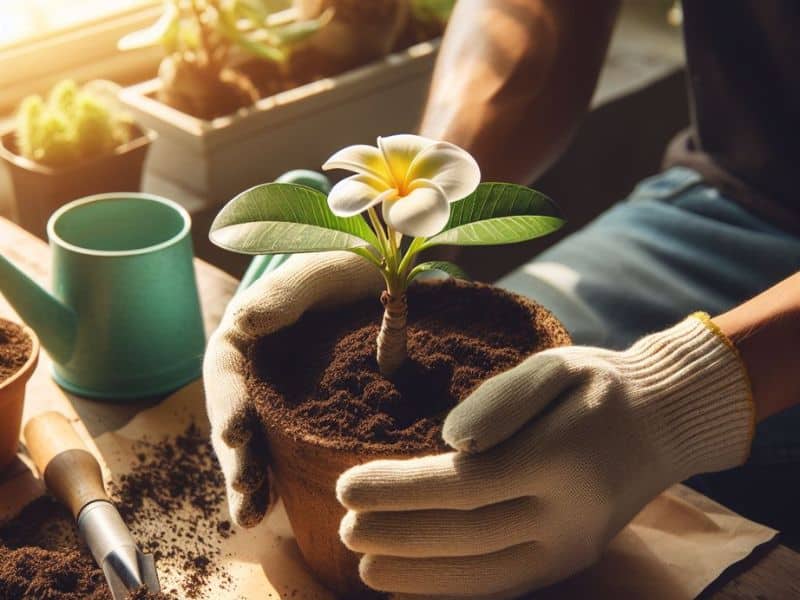
Step-by-step Planting Guide
After selecting a healthy cutting and preparing it with a clean cut and rooting hormone, you’re ready to plant. Here’s how:
- First, fill a pot with a well-draining soil mix. Remember, plumeria loves a good sunbath but hates wet feet, so picking a mix with plenty of perlite or sand helps.
- Next, make a hole in the center of your potting mix. The depth should accommodate the bottom third of your cutting. Think of it as tucking in a child under a cozy blanket, but in this case, the child is your plumeria cutting, and the blanket is the soil.
- Carefully place your cutting into the hole without letting the treated end touch the sides much. It’s like playing Operation; keep a steady hand.
- Firmly press the soil around the base to support the cutting. Don’t compact it too much; you’re aiming for snug, not tight.
- Water lightly. Your cutting isn’t thirsty yet, just a bit parched. Overwatering at this stage is a no-no.
- Last, place your pot in a warm, brightly lit spot but out of direct sunlight. Your plumeria cutting is not ready to face the full fury of the sun yet.
Tips for Ensuring Proper Growth
Ensuring your plumeria cutting thrives involves more than just watching and waiting. Here are some key tips:
- Patience is a virtue. Do not expect immediate growth. Your cutting is putting down roots, literally. This process can take several weeks, so keep calm and carry on.
- Resist the urge to overwater. Your cutting’s roots are developing, and too much water can lead to rot. Water only when the soil feels dry to the touch on top.
- Don’t move your plant around too much. Plumerias can be a bit dramatic and don’t appreciate the constant change. Find a good spot and let it be.
- Be on the lookout for pests. Shield your baby from those looking to take a bite. A gentle insecticide can help prevent pests from setting up shop.
Aftercare for Plumeria Cuttings
Watering and Feeding Practices
Initially, watering your plumeria cutting may well seem like a balancing act. Too little, and it dries out; too much, and you risk rot. Aim for the soil to be slightly moist, not waterlogged. A simple trick is to stick your finger 1 inch into the soil. If it feels dry, it’s time to water.
As for Plumeria feeding, patience is key. Wait until you see new growth before introducing a high-phosphorus fertilizer to encourage blooming. This usually takes a few months, so don’t rush. Consistency in both watering and feeding schedules promotes strong root development and vibrant flowers.
Monitoring Growth and Health
Keeping an eye on your plumeria’s progress involves more than watching it grow. You’re on the lookout for pests like spider mites and signs of diseases such as rust.
Catching these early often means the difference between a minor issue and a major problem. If you spot pests, a gentle insecticidal soap works wonders without harming the plant.
For disease, removing affected areas and improving air circulation around the plant can prevent further spread. Remember, a healthy plumeria is a happy plumeria, so staying vigilant pays off in lush blooms and robust growth.
Troubleshooting Common Issues
Dealing with Pest and Diseases
Encountering pests and diseases can feel like a setback when you’re nurturing plumeria cuttings. First on your hit list should be the common culprits: spider mites and rust. For spider mites, a simple blast of water may remedy mild infestations.
If that doesn’t cut it, consider using insecticidal soap. Remember, treating early is key, so keep a vigilant eye. Rust, characterized by orange, powdery spots on leaves, requires removing affected areas and applying fungicide to halt its spread.
As these plants thrive in sunny, well-ventilated areas, ensuring your plumeria has ample space and light can prevent these issues, including leaves turning yellow, before they even start.
Addressing Slow or Stunted Growth
If your plumeria’s growth seems more like a leisurely stroll than the sprint you were hoping for, it may well be calling for help. Poor light, incorrect watering habits, or nutrient deficiencies often bring growth to a crawl.
Ensure your plumeria is basking in full sunlight for the best chance at vigorous growth. Over or under-watering can both spell trouble, so aim for a happy medium where the soil is slightly moist but never soggy.
If you’ve ticked these boxes and growth is still sluggish, a balanced fertilizer may well just be the pick-me-up your plumeria needs. Start with a low dose to avoid overwhelming your plant, and watch as it hopefully returns to its former glory.
Frequently Asked Questions
What are the benefits of growing plumeria plants from cuttings?
Growing plumeria from cuttings allows for faster maturity and blooming compared to starting from seeds. It’s also an efficient way to replicate the exact features of the parent plant, ensuring the propagation of specific desirable traits.
How do I select healthy plumeria cuttings for propagation?
Choose cuttings that are at least 12 inches long, have a healthy green appearance, and are free from signs of pests, disease, or damage. A slightly woody stem is ideal for propagation.
What materials do I need for planting plumeria cuttings?
You’ll need well-draining soil mix, a pot or planting container, rooting hormone (optional), and the plumeria cutting itself. Ensure the pot has adequate drainage holes to prevent waterlogging.
How deep should I plant plumeria cuttings?
Plant the cuttings so about a third of their length is buried in the soil. This depth supports the cutting’s stability and promotes root development while preventing rot.
What is the proper aftercare for plumeria cuttings?
Maintain slightly moist soil without overwatering, wait for new growth before using high-phosphorus fertilizer, and ensure the plant gets adequate sunlight. Monitor for pests and diseases and treat as needed to keep the plant healthy.
How do I identify and treat pests and diseases on plumeria plants?
Spider mites appear as tiny red or yellow dots under leaves, treatable with insecticidal soap. Rust, a fungal disease, presents as orange pustules on leaves and is treatable with a fungicide. Early identification and treatment are key to control.
Why is my plumeria plant’s growth slow or stunted?
Slow or stunted growth can be due to insufficient light, improper watering, or nutrient imbalance. Ensure the plant is receiving enough sunlight, adjust your watering practices, and use a balanced fertilizer judiciously to encourage healthy growth.