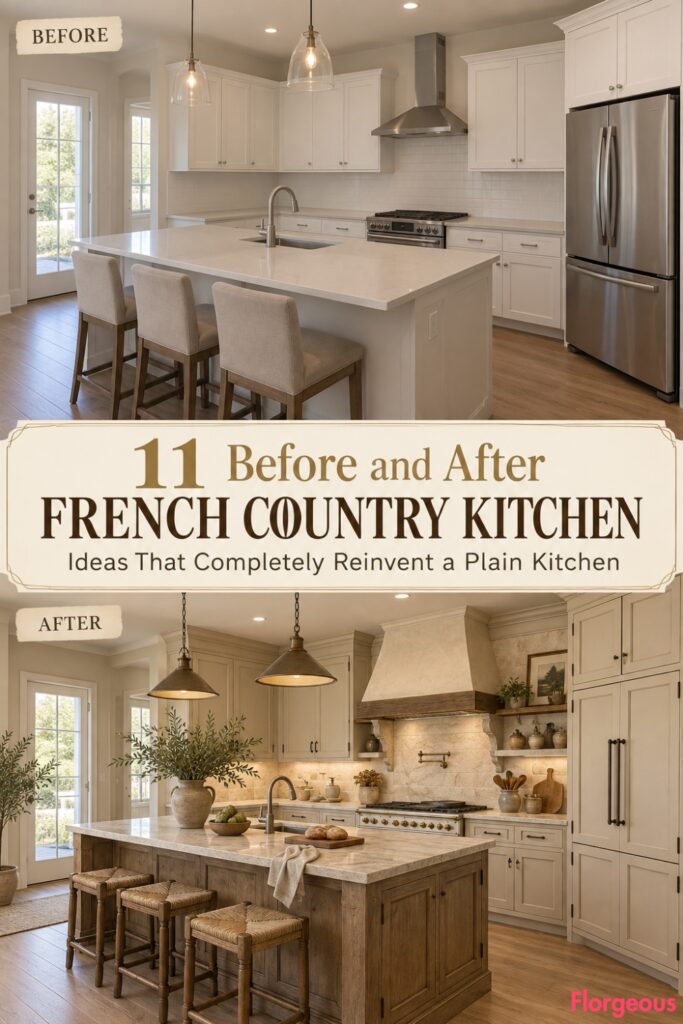
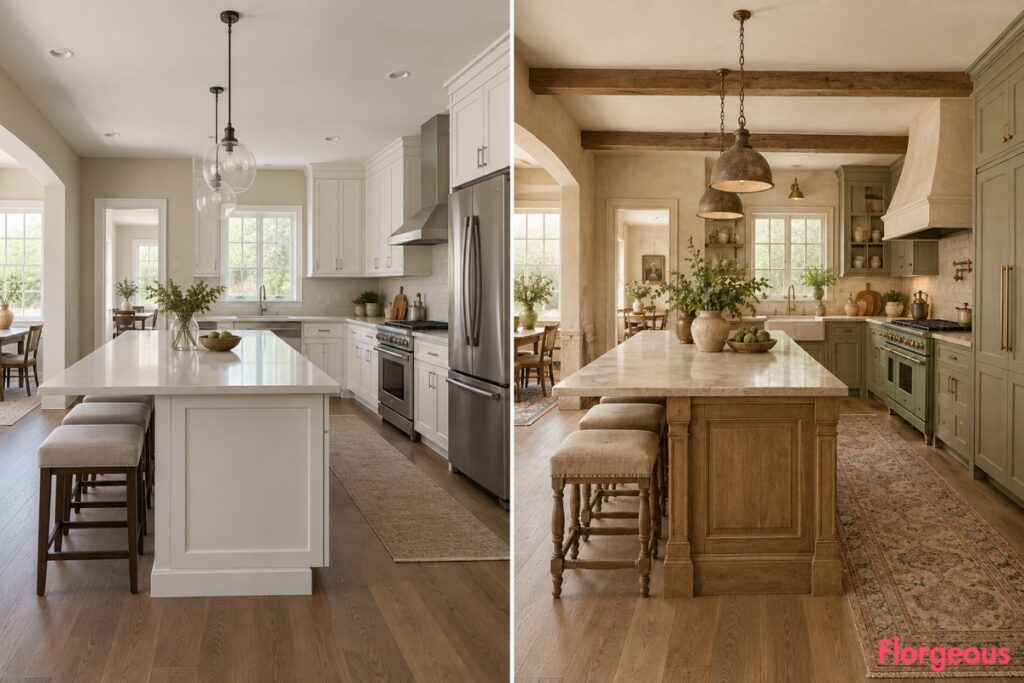
A builder-grade kitchen can be functional and still feel completely anonymous. Neutral cabinet fronts, generic counters, visible appliances, standard lighting, and bare surfaces give the room very little personality.
That makes it an ideal starting point for a French Country Kitchen makeover. Instead of moving walls or changing the working layout, these ideas use traditional craftsmanship, regional references, furniture-like cabinetry, tactile surfaces, and practical country-house details to completely change how the same room feels.
The starting kitchen remains identical throughout. Its walls, windows, doors, ceiling geometry, appliance locations, plumbing, island footprint, circulation, camera relationship, and overall dimensions stay fixed. What changes in every AFTER is the design language.
1. Give Plain Cabinets the Weight of an Old Normandy Farmhouse
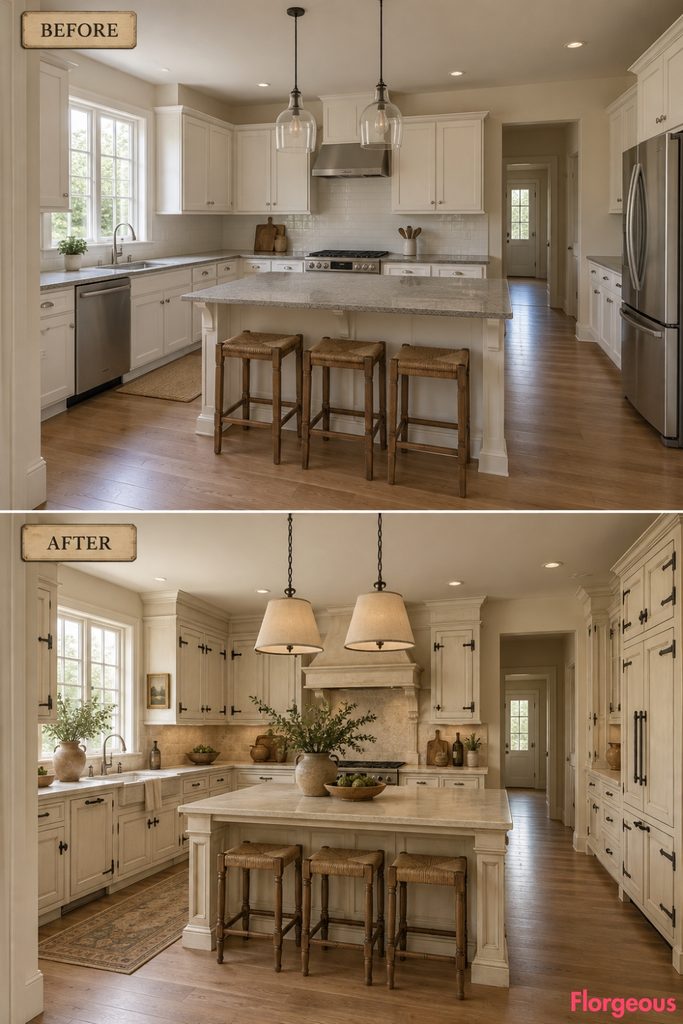
The quickest way to make the original room feel less builder-grade is not simply to repaint the cabinetry. Change the way the cabinetry is constructed visually.
Before: The same neutral kitchen begins with lightweight cabinet fronts, simple counters, standard exposed appliances, ordinary lighting, bare surfaces, and no architectural focal point.
After: Reface the cabinetry with broad putty-cream framed doors fitted with oversized hand-forged matte-black H hinges, traditional latches, and small iron escutcheons. Deepen the island detailing within its existing footprint, switch to warm pale-stone worktops, soften the lighting with linen shades, and conceal the refrigerator behind matching framed panels.
The entire room now feels heavier, older, and intentionally crafted even though nothing structural has moved.
Designer Tip: Let the hinges look functional. Highly ornate black hardware can quickly push the room toward themed rustic decor.
2. Let a Celadon French Range Become the Jewel of the Cooking Wall
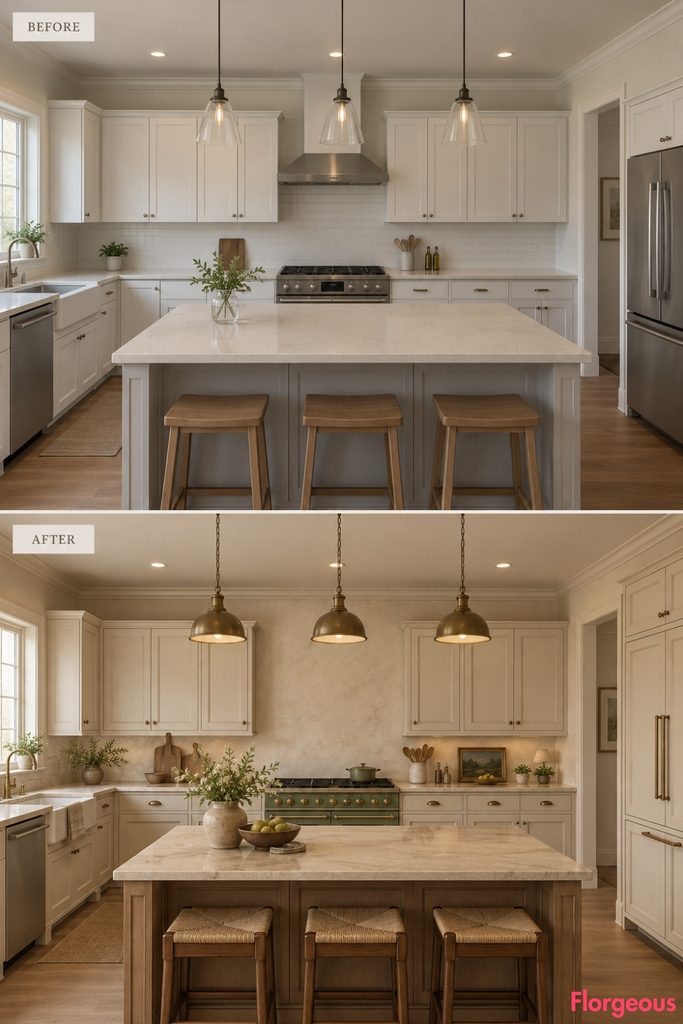
The original cooking zone has no hierarchy. A standard range sits among equally ordinary cabinetry and finishes.
Instead of surrounding it with another oversized decorative hood, make the cooker itself the focal point. Replace the visual presence of the standard appliance with a substantial traditional French-style enamel range in a muted celadon green, finished with warm aged-metal controls.
Around it, introduce parchment-painted framed cabinetry, a restrained mineral-plaster backsplash, creamy stone counters, and quiet walnut-toned accents. Keep the upper cooking wall simple so the colored range has room to breathe.
Why It Works: A strong functional centerpiece gives the kitchen an identity without filling the room with decorative features.
3. Turn One Storage Bay Into a Burgundy Wine-Country Larder
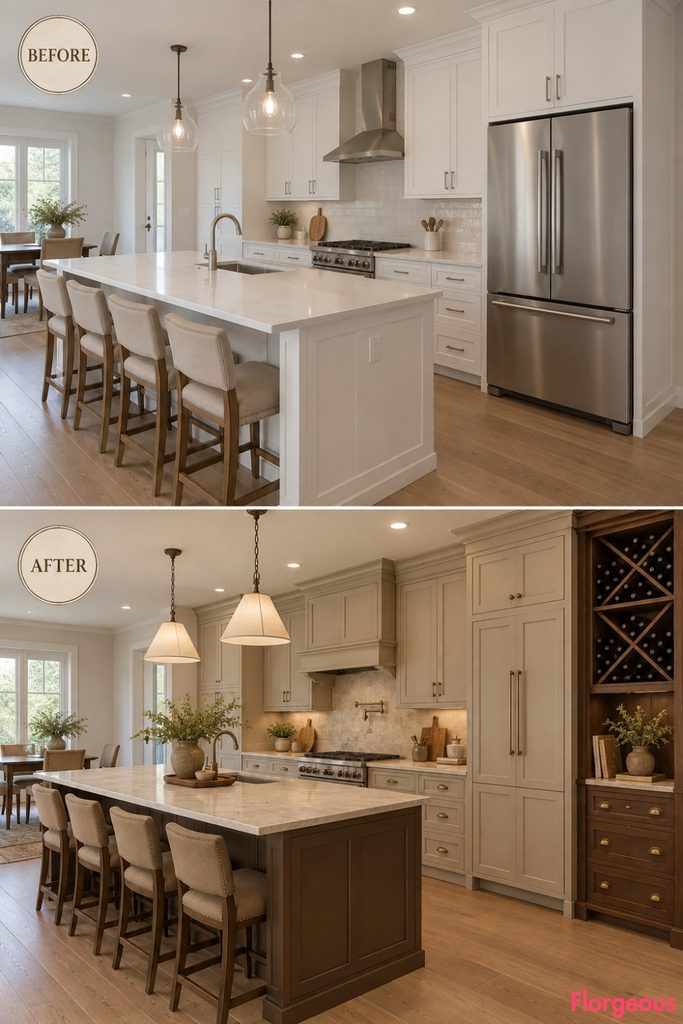
A wine-country kitchen needs more than burgundy paint or a few bottles on a counter. Here, the storage itself creates the concept.
Before: The same kitchen has a conventional bank of tall cabinets and a visible refrigerator with no special storage architecture.
After: Convert one existing tall cabinet bay into a full-depth dark chestnut larder fitted with generous diagonal bottle cubbies. Use only plain, unlabeled dark bottles so the feature reads as useful storage rather than commercial wine display.
Warm limestone-beige cabinetry surrounds the darker larder, while the existing island becomes a deep tobacco tone. Pale worktops and soft shaded lights keep the composition from becoming too heavy. The refrigerator remains in its exact original location but disappears behind simple limestone-beige panels.
Style Note: Keep the diagonal grid exclusive to one storage bay. Repeating it elsewhere would weaken the focal point.
4. Introduce Woven Rush Panels for a Softer Provincial Kitchen
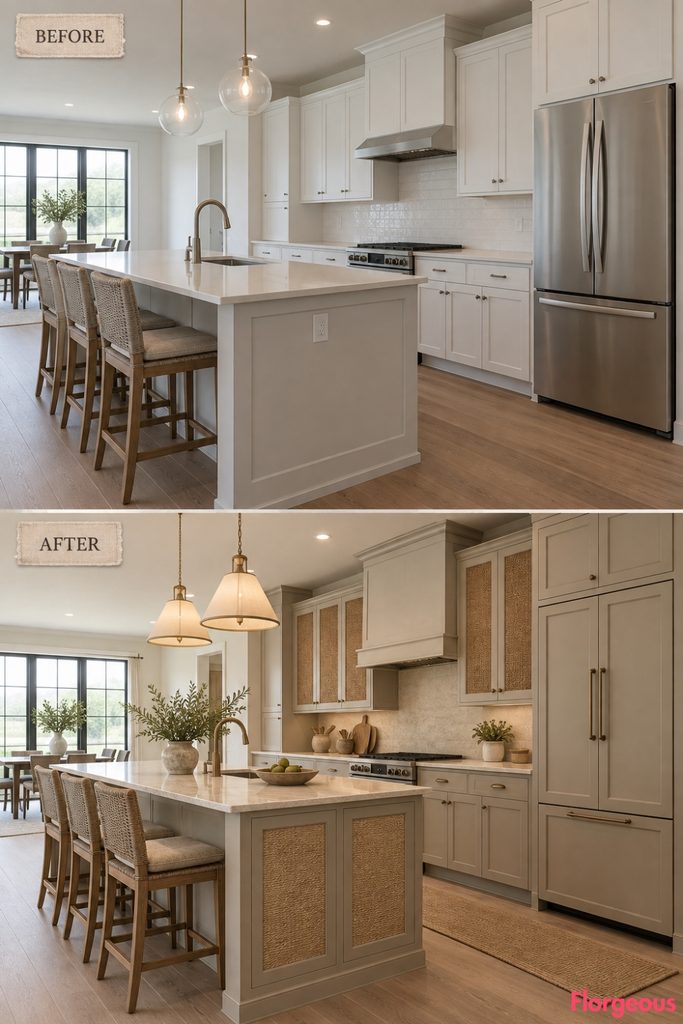
This makeover uses a material associated with traditional French seating and country furniture, but moves it onto the fitted cabinetry.
From the same plain starting room, replace selected solid door centers with tightly woven natural rush panels framed in muted warm-gray timber. Use them sparingly on a group of upper cupboards and on the two visible ends of the existing island.
The remaining cabinetry stays solid and softly painted. Pair the woven texture with smooth cream stone, simple aged-bronze knobs, chalky walls, and warm opaque pendant lights.
The contrast between woven rush and solid joinery gives the AFTER a relaxed, handmade quality without relying on distressed timber, chicken wire, or open shelving.
Try This: Keep rush away from the wettest cabinet locations and reserve it for doors that benefit from ventilation and texture.
5. Make a French Épicerie Drawer Wall the Room’s Most Useful Feature
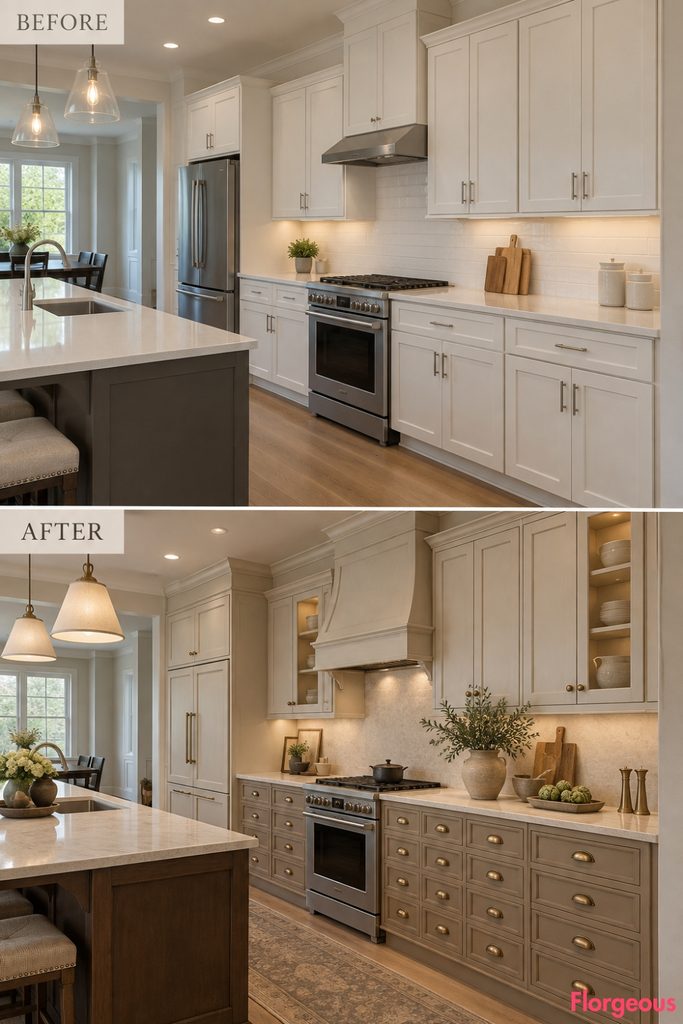
Old country shops and working pantries often relied on banks of small drawers for dry goods. That practical storage logic can give a fitted kitchen a completely different rhythm.
Before: One cabinet run is visually repetitive, made from standard doors and drawers with no hierarchy.
After: Reconfigure the visible fronts of that same run into a dense bank of shallow and medium-height drawers. Use warm mushroom paint, unlabeled aged-brass cup pulls, thicker framing around the whole composition, and a plain pale-stone top.
Do not add printed labels. The repetition of the hardware and drawer proportions creates enough graphic interest.
Balance the detailed drawer wall with quieter bone-colored cabinetry elsewhere and a restrained deep-brown island.
Practical Detail: Different drawer depths make this more than decoration. Shallow drawers suit utensils and linens, while deeper lower drawers handle heavier pantry items.
6. Show the Joinery With Scrubbed Poplar and Exposed Dovetails
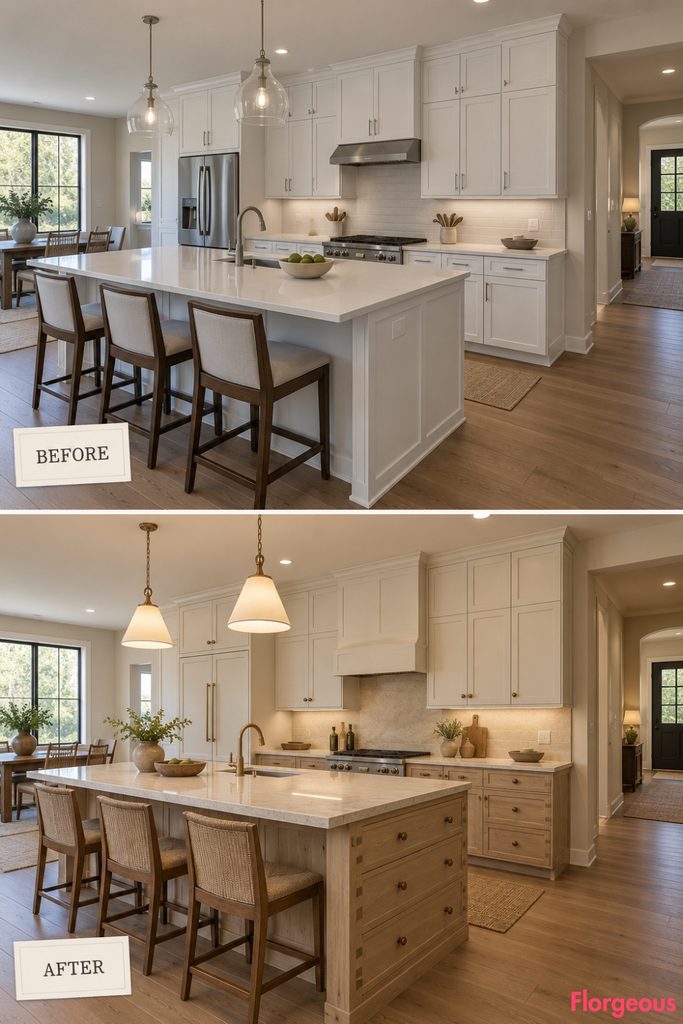
This version avoids decorative carving altogether. Its beauty comes from showing how the cabinetry is made.
Rebuild the lower cabinet fronts in pale scrubbed poplar with wide drawers and carefully exposed dovetail joints at visible corners. The timber should feel waxed and smooth from use, not artificially distressed.
Keep the upper cabinetry painted soft bone so the room does not become an all-wood kitchen. Pale mineral stone, understated turned-wood knobs, and simple warm-white lighting complete the scheme.
The BEFORE feels factory-made. The AFTER feels as if a country joiner built every lower cabinet specifically for the house.
Common Mistake: Do not combine visible joinery with heavy distressing, carved doors, and ornate hardware. The craftsmanship is already the decoration.
7. Give a Normandy Dairy Pantry Porcelain Ventilation Rosettes
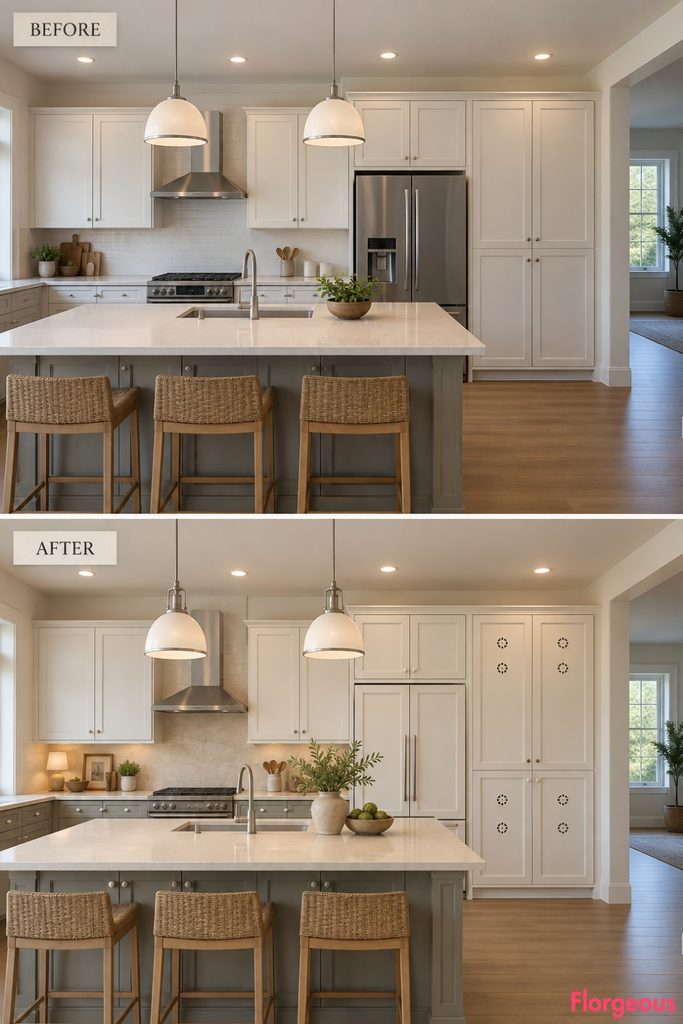
This is one of the quieter transformations, but its detailing is unlike the other rooms.
Before: The tall pantry doors are plain, and the refrigerator reads immediately as an appliance.
After: Rebuild selected pantry fronts as chalk-white framed doors punctuated by small round white porcelain ventilation rosettes arranged in disciplined vertical pairs. The perforated ceramic pieces reference old food-storage cupboards while staying lighter than mesh or louvers.
Soft gray lower cabinetry, creamy stone worktops, tiny porcelain knobs, and restrained nickel-toned fixtures create a cool dairy-house palette. Keep the refrigerator behind completely plain chalk-white panels so the rosettes remain special to the pantry doors.
Small Space Tip: Repeating one small functional detail vertically can make tall storage feel custom without making it visually heavier.
8. Build a Boulangerie Prep Run With Pull-Out Beech Breadboards
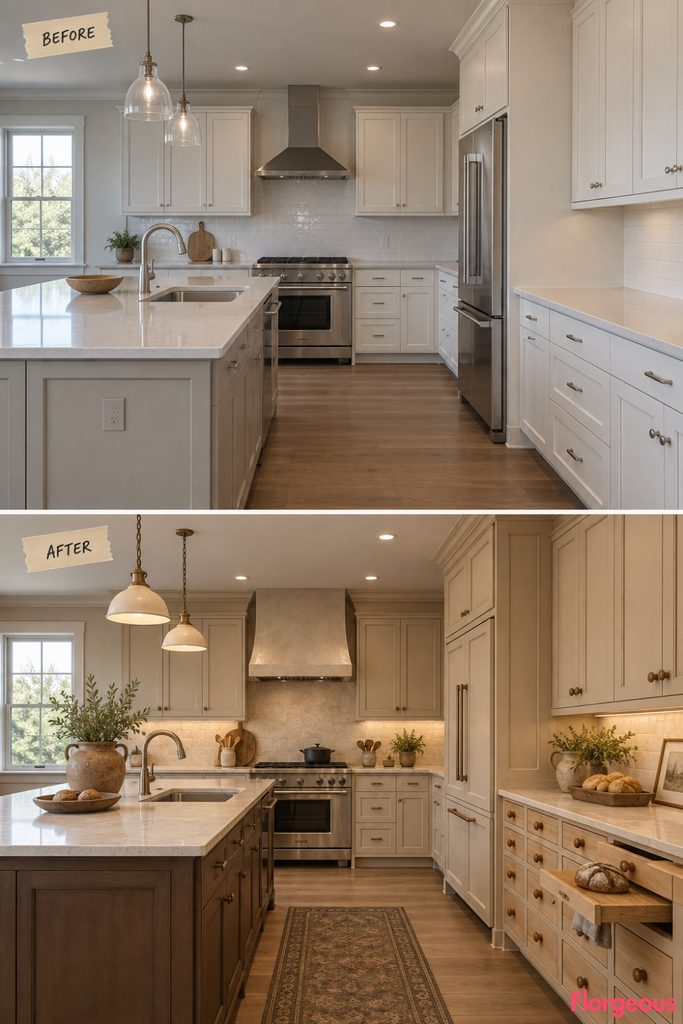
Instead of adding another decorative focal point, this makeover changes how one part of the kitchen works.
Keep every cabinet position intact, but rebuild one existing counter run with a horizontal sequence of extra-wide shallow drawers. Beneath them, integrate thick solid-beech pull-out breadboards whose pale timber edges remain visible in a repeated line.
For the AFTER image, let one board project slightly to make the function immediately understandable.
Use clay-cream cabinetry, quiet limestone-colored counters, rounded wooden pulls, and a deep tobacco island. There is no bakery signage, marble pastry table, or freestanding workbench.
Budget Version: A carpenter can retrofit a single pull-out breadboard into an existing cabinet if rebuilding an entire drawer run is not realistic.
9. Pull the Eye Up With a Limewashed Board Ceiling
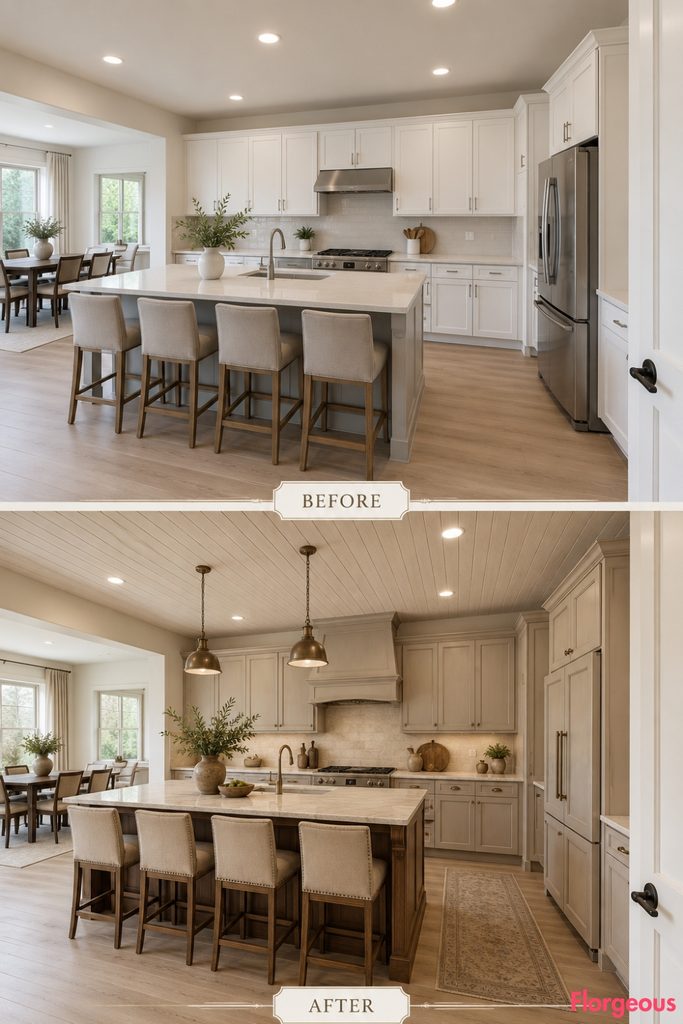
Most kitchen makeovers concentrate entirely on cabinets and counters. This one shifts the visual hierarchy upward.
Before: The same builder-grade kitchen has a plain uninterrupted ceiling that contributes almost nothing to the room.
After: Preserve its exact height, slope, perimeter, and geometry, but surface the existing ceiling plane with narrow tongue-and-groove boards finished in a chalky limewash. Do not add beams, coffers, dropped structures, or change the ceiling shape.
Below it, keep the cabinetry a mellow clay-beige with uncomplicated framed doors. Use pale stone counters, dark fruitwood accents, and compact aged-metal ceiling lights that sit close enough to let the board pattern remain visible.
The new ceiling gives the room an enveloping old-house quality without altering its architecture.
Style Note: The ceiling boards should be narrow and matte. Wide glossy planks would feel more contemporary farmhouse than French country.
10. Turn Lower Storage Into a French Market Basket Pantry
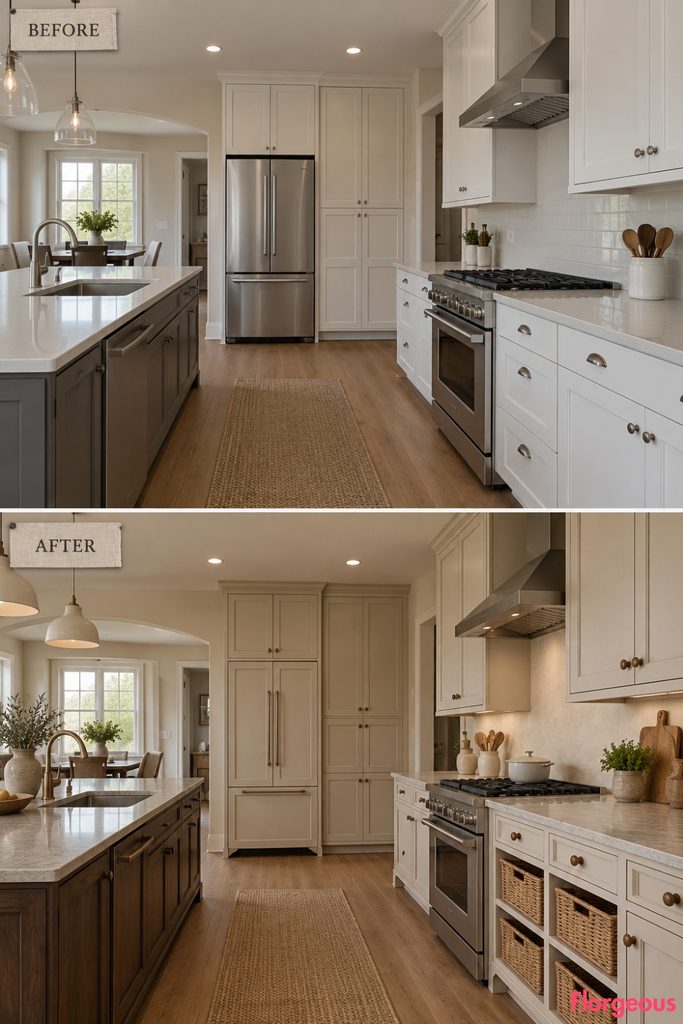
This room gets its character from humble storage rather than ornate cabinetry.
Along one existing lower cabinet section, replace several conventional drawer fronts with fitted removable willow baskets that slide into substantial painted timber bays. Each basket should be deep, tightly woven, and practical enough for produce, linens, or pantry goods.
The rest of the cabinetry stays solid in a muted oatmeal color. Smooth warm-gray stone counters, simple wooden knobs, cream walls, and understated ceramic lighting prevent the woven storage from becoming overly rustic.
The BEFORE is a continuous run of anonymous cabinets. The AFTER has an immediately recognizable country-market rhythm.
Why It Works: Basket storage brings texture into the lower half of the room without repeating open shelves, mesh doors, or decorative wall storage.
11. Finish With a Ceiling-Hung Provençal Herb Drying Frame
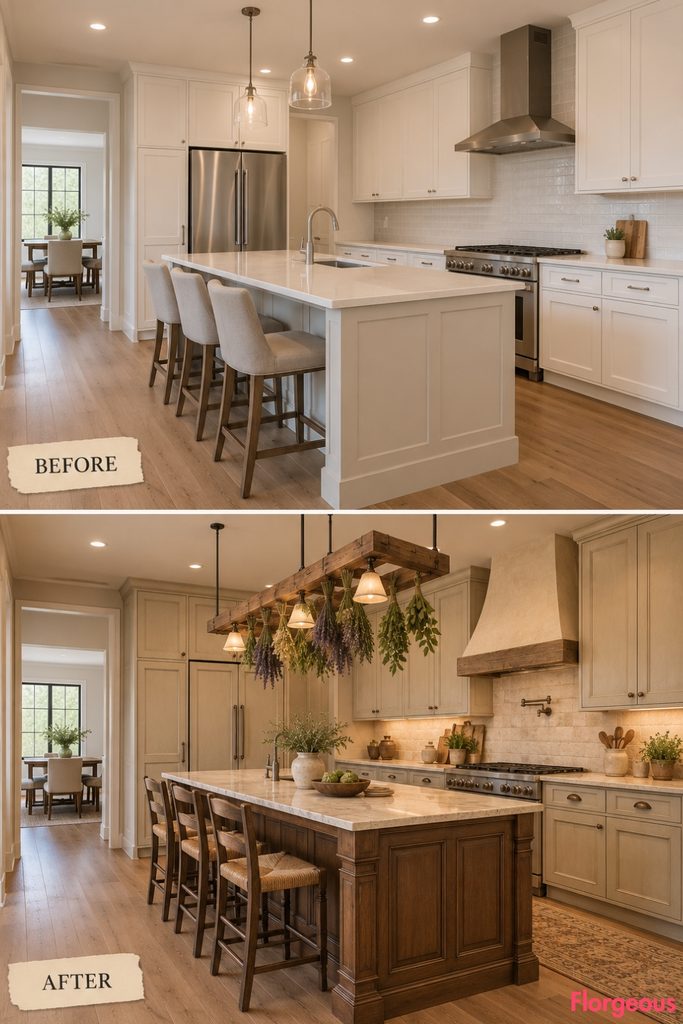
The final makeover uses the air above the work zone rather than another patterned backsplash or feature floor.
Before: The builder-grade room has a plain ceiling light and an island that feels visually disconnected from the rest of the kitchen.
After: Keep the island footprint and ceiling geometry untouched, but suspend a long, shallow aged-oak drying frame above the island using simple dark metal rods. Hang a controlled number of dried lavender stems, bay branches, rosemary, and culinary herbs from the frame, leaving plenty of open space between bundles.
Integrate small shaded task lights into the same suspended composition so it functions as both working light and drying rack.
Below, give the kitchen warm flax-colored framed cabinetry, pale cream stone, dark wood island detailing, and understated bronze hardware. The result feels like an active rural kitchen rather than a staged room filled with decorative props.
How to Choose the Right French Country Direction for Your Kitchen
A convincing French Country Kitchen does not need every rustic French detail in the same room. The strongest results usually begin with one defining idea, then let the remaining finishes support it.
If you love visible craftsmanship, the forged hinges, dovetail joinery, or boulangerie breadboards give ordinary cabinetry much more character. If you prefer a softer room, woven rush or basket storage creates texture without making the kitchen visually heavy. A colored enamel range works particularly well when you want one strong focal point instead of decorative treatment across every surface.
Before making changes, decide what you want people to notice first. Once that hero feature is clear, keep secondary materials quieter. This prevents French country style from slipping into themed decor and makes the makeover feel much more intentional.
Most importantly, compare every new finish against the original room before renovating. The best AFTER should feel dramatically richer and more personal while still respecting the kitchen’s existing architecture, working zones, circulation, and practical needs.