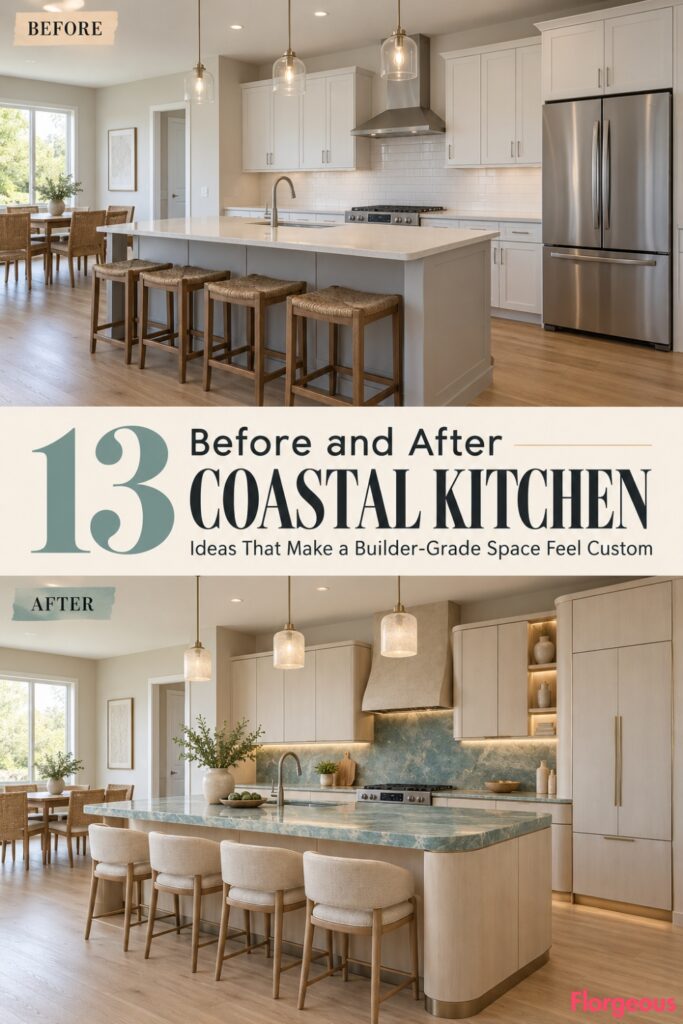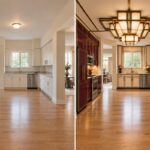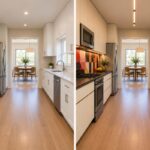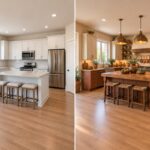
A builder-grade kitchen can be perfectly usable and still feel like it is waiting for an identity. Standard cabinet doors, predictable counters, visible appliances, generic lighting, and an ordinary island make a practical room, but they rarely create the kind of space you remember.
The most interesting Coastal Kitchen designs go much further than white paint and blue accessories. Coastal character can come from salt-softened metals, luminous surfaces, unusual cabinet materials, handcrafted joinery, curved forms, mineral color, and finishes that react beautifully to natural light.
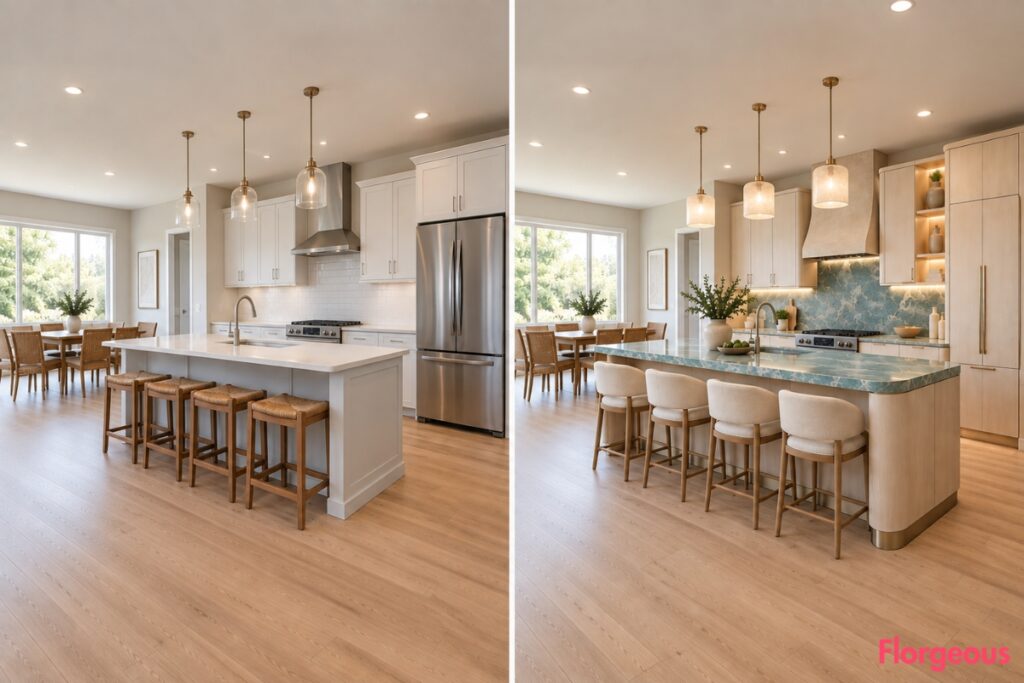
Every makeover below starts with the same plain kitchen: neutral builder-grade cabinetry, simple counters, standard visible appliances, a basic island, ordinary lighting, bare surfaces, warm light flooring, and soft natural daylight. Walls, windows, doors, ceiling geometry, flooring footprint, plumbing, appliance positions, island footprint, and circulation always stay fixed.
The camera viewpoint changes from section to section to keep the gallery visually fresh. Within each individual BEFORE and AFTER pair, however, the camera position, lens, framing, perspective, and daylight direction remain exactly identical.
1. Give the Kitchen a Salt-Air Patina With Zinc Worktops
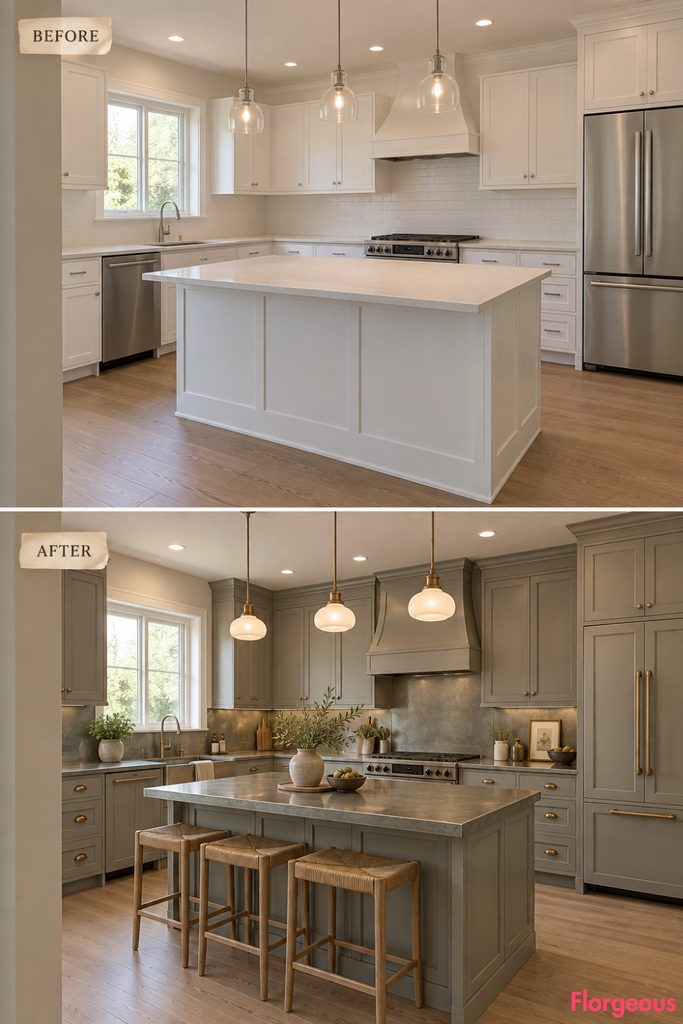
This version feels quiet, weathered, and architectural, inspired by materials that develop character in coastal environments.
Before: The kitchen has neutral builder-grade cabinetry, basic laminate-style counters, standard visible appliances, a plain island, generic ceiling lights, bare surfaces, and no visual focal point.
After: Replace the generic fronts with tailored salt-gray cabinetry using slim recessed framing. Wrap the existing countertops in softly patinated zinc and continue the metal several inches up the wall as a clean continuous upstand. Add pale ash details, warm ivory walls, integrated refrigerator panels, and compact opaline lights. The island stays in exactly the same footprint but receives matching salt-gray joinery and zinc surfacing.
The new room feels intentionally aged and sophisticated rather than simply recolored.
Designer Tip: Zinc develops marks and tonal variation naturally, which is part of its appeal.
2. Create a Scandinavian Archipelago Kitchen With Exposed-Edge Birch Joinery
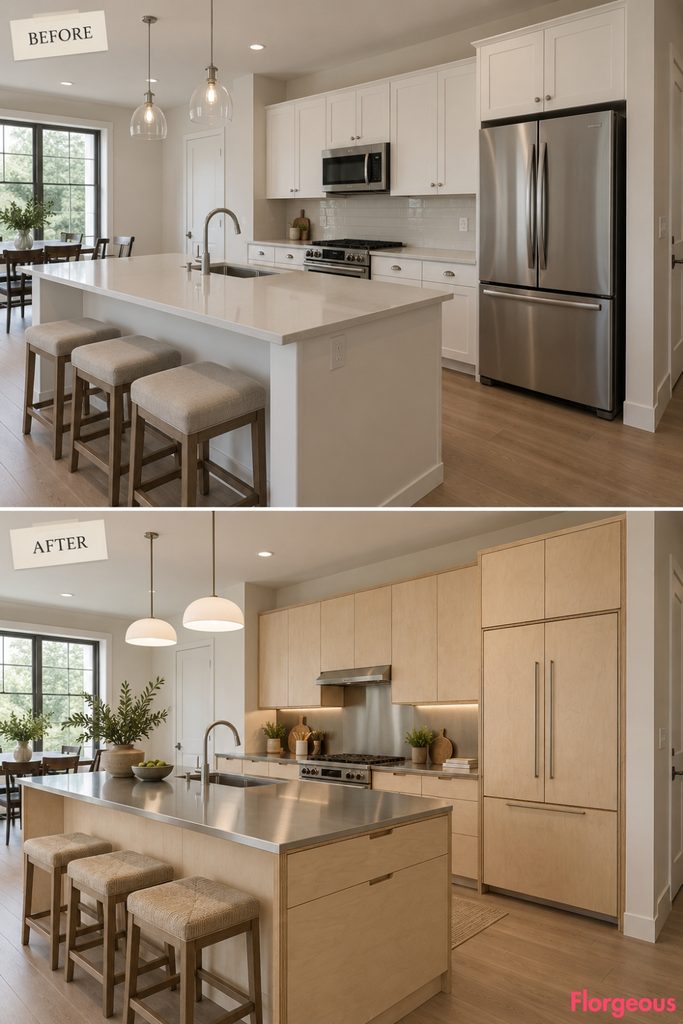
This coastal direction feels lighter, sharper, and more contemporary.
Before: The same builder-grade kitchen appears with ordinary neutral cabinet fronts, generic countertops, exposed appliances, plain hardware, a simple island, and basic overhead lighting.
After: Rebuild the visible cabinetry in pale birch plywood with refined exposed laminated edges around doors, drawer fronts, and end panels. Remove decorative hardware and use recessed timber finger pulls instead. Introduce satin stainless-steel counters and coordinated refrigerator panels. The island remains exactly where it was but becomes a precise pale-birch worktable-like volume.
The exposed ply edges create a graphic pattern that makes the kitchen feel crafted rather than mass-produced.
Why It Works: The material construction itself becomes the decoration.
3. Make Glazed Lava Stone the Unexpected Coastal Focal Point
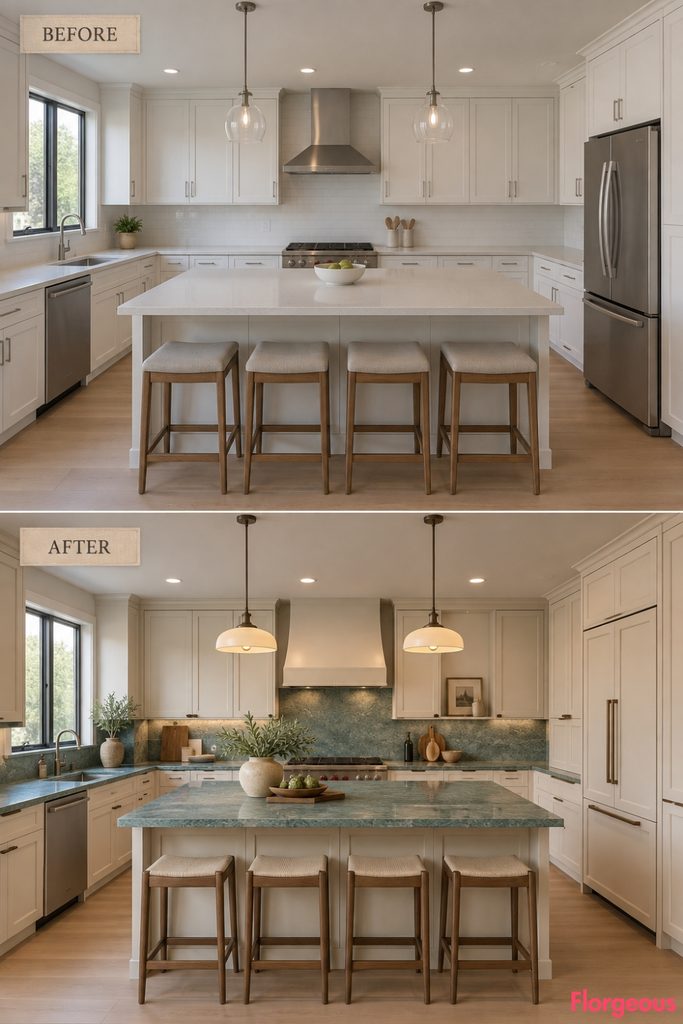
Instead of timber or painted cabinetry carrying the design, this makeover revolves around an unusual mineral surface.
Before: The kitchen starts with the same neutral cabinet fronts, basic pale counters, visible appliances, ordinary island, generic lights, and almost no styling.
After: Replace the counters with glazed volcanic lava stone in a muted mineral aqua. Its subtly irregular reflective surface becomes the strongest feature in the entire room. Keep the cabinetry bone-colored and tailored, use narrow dark-bronze edge pulls, integrate the refrigerator, and add pale timber accents around the existing island.
The makeover introduces color, texture, and artistry without relying on conventional coastal blue-and-white styling.
Color Story: Mineral aqua, bone, bronze, pale timber, and natural daylight.
4. Replace Ordinary Cabinet Inserts With Perforated Bronze Screens
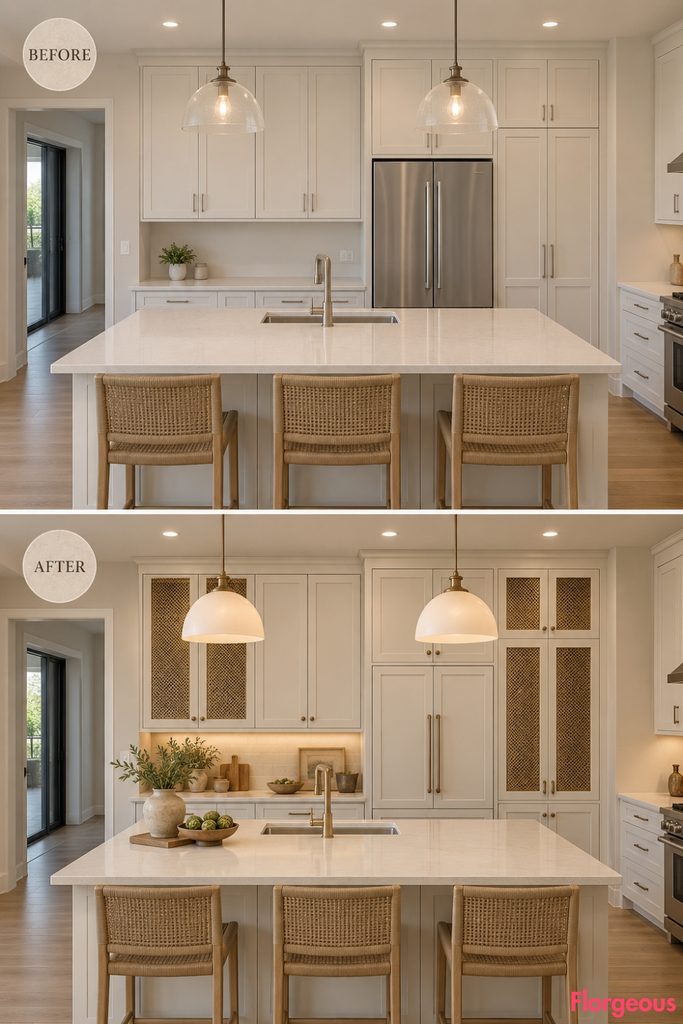
This version uses crafted metalwork rather than woven fibers or glass.
Before: The room has the same solid builder-grade doors, exposed refrigerator, generic counters, standard hardware, plain island, and ordinary ceiling lighting.
After: Replace selected dry-storage door centers with finely perforated aged-bronze screens set inside substantial alabaster-painted frames. Keep the other doors completely solid so the metal becomes a controlled feature. Add cream quartz surfaces, pale timber accents, integrated refrigeration, and soft opaque lighting.
The AFTER feels more dimensional and artisan-made, while still remaining practical and refined.
Style Note: Use very fine perforations so the doors feel residential rather than commercial.
5. Use Natural Linoleum Cabinet Fronts for a Soft Mineral Palette
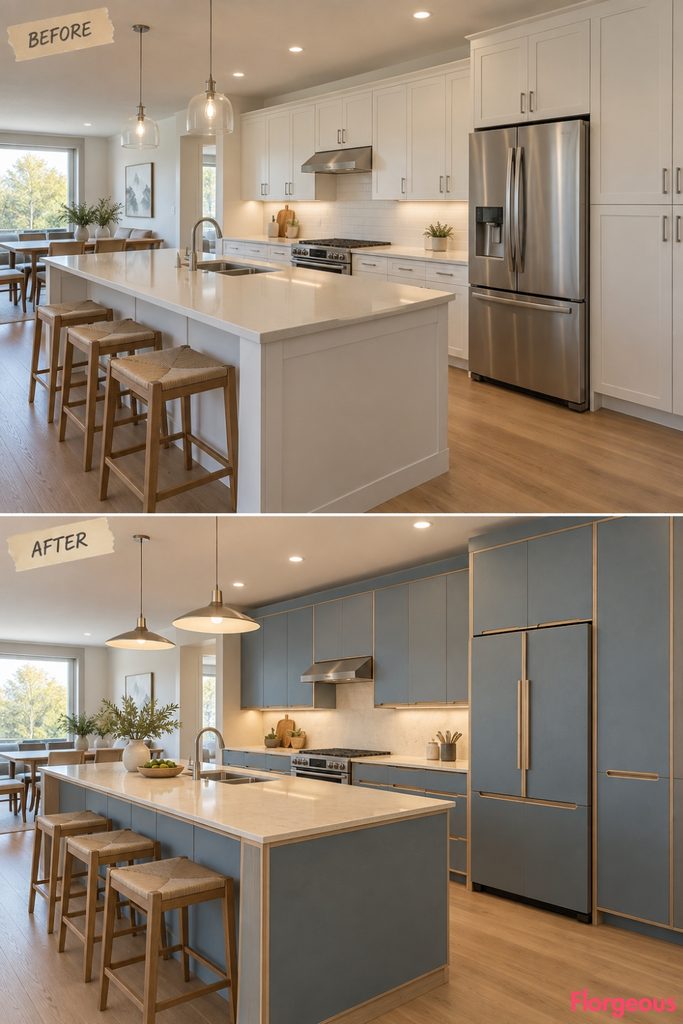
Here, the cabinetry surface itself creates the coastal character.
Before: The same kitchen begins with flat neutral doors, ordinary counters, exposed appliances, a standard island, generic handles, and plain lighting.
After: Cover all visible cabinet fronts in matte mineral blue-gray natural linoleum and finish the edges with narrow pale-oak bands. Replace protruding handles with discreet integrated pulls. Add warm off-white counters, minimal stainless details, and matching refrigerator panels.
The matte linoleum creates a tactile, soft-focus finish that feels entirely different from painted timber.
Budget Version: Professionally wrapped slab fronts can create a similar visual effect without rebuilding every cabinet box.
6. Soften the Entire Kitchen With Continuous Radius Cabinetry
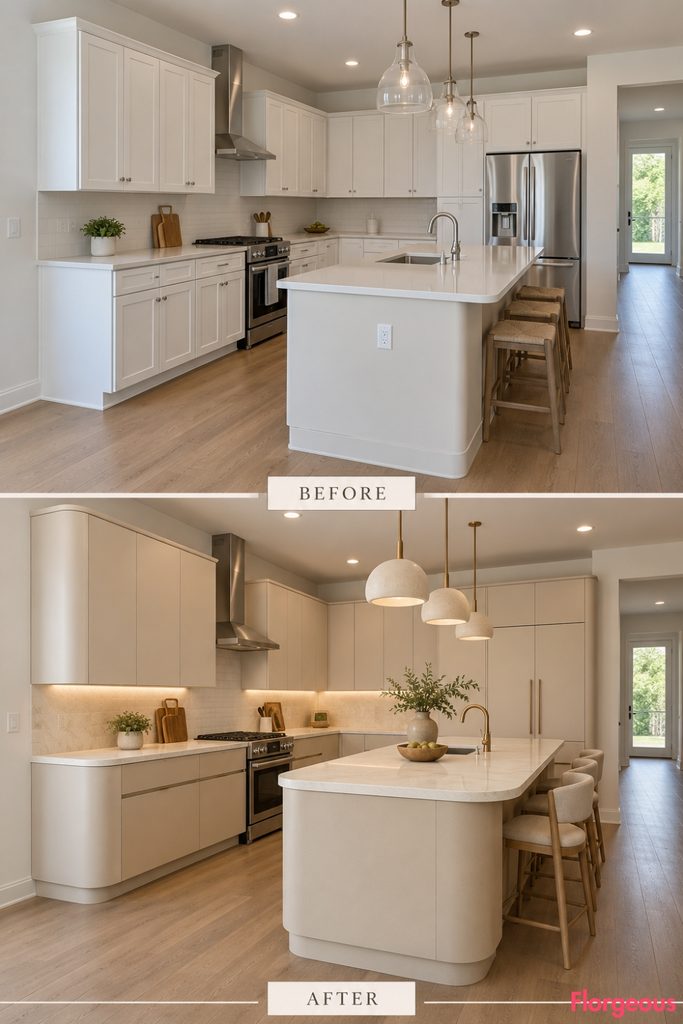
This concept changes the geometry of the kitchen instead of simply changing materials.
Before: The builder-grade room has squared cabinet ends, a boxy island, straight-edged countertops, exposed appliances, and flat generic lighting.
After: Keep every cabinetry run and the island footprint in exactly the same place, but rebuild exposed ends with generous radius corners. Give the island matching curved outer corners without extending its footprint. Add sandy shell-toned cabinetry, thick warm-white counters with rounded bullnose profiles, recessed pulls, and sculptural compact lighting.
The kitchen shifts from rigid and boxy to calm and sculptural.
7. Give the Kitchen a Vintage Seaside-Modern Porcelain-Enamel Finish
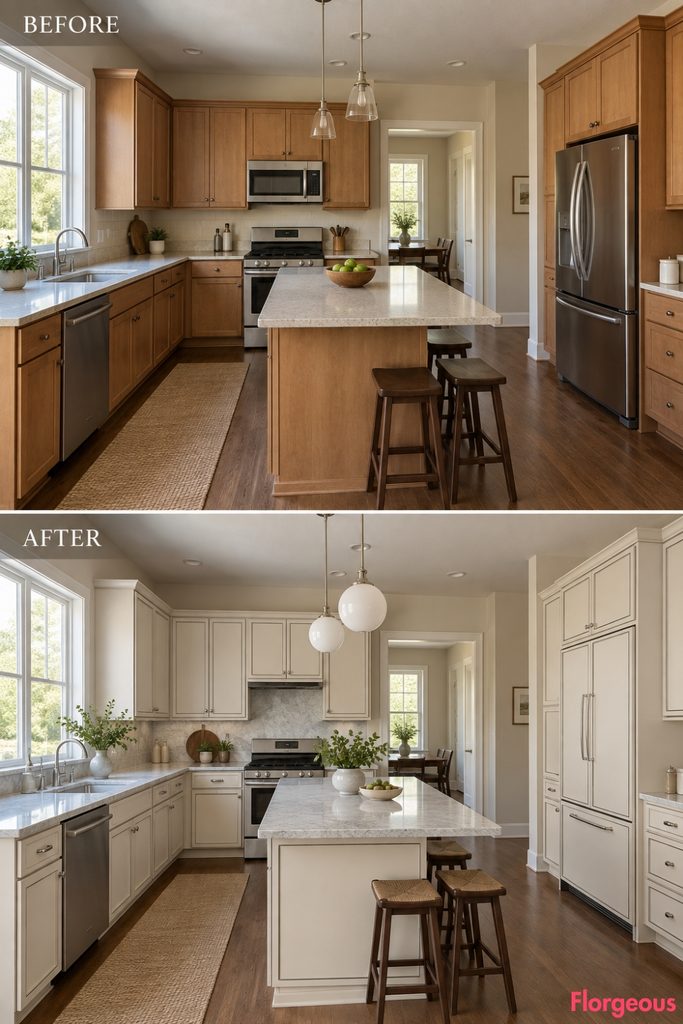
This version moves away from wood completely and uses a crisp utility material.
Before: The same kitchen appears with conventional painted cabinet fronts, neutral counters, standard appliances, simple island panels, and generic fixtures.
After: Replace the visible cabinetry fronts with warm ivory porcelain-enamel steel panels edged with very fine dark borders. Continue the enamel treatment across the island cabinetry while keeping the original island form. Add pale gray stone counters, polished chrome fittings, coordinated refrigerator panels, and simple opaque globe lighting.
The room gains a polished seaside-modern character without turning into a retro theme.
Why It Works: Porcelain enamel reflects light differently from paint, creating a cleaner and more distinctive surface.
8. Turn the Cabinetry Into an Artisan Feature With Ceramic-Clad Fronts
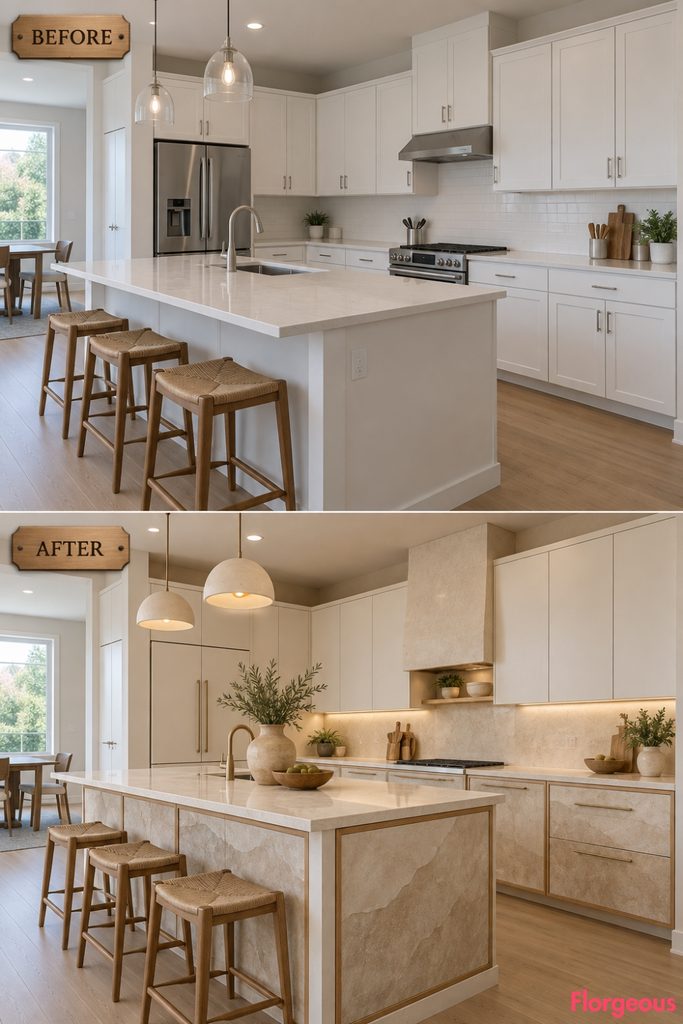
Instead of putting handmade ceramics on a backsplash, this idea applies them directly to joinery.
Before: The starting kitchen has smooth generic cabinet fronts, standard counters, visible appliances, a basic island, ordinary lighting, and no handcrafted focal point.
After: Face selected broad lower doors and drawer fronts with large matte sand-glazed stoneware slabs contained within narrow pale-timber frames. Repeat the ceramic treatment on the visible island face, while keeping the remaining cabinetry smooth warm white. Add pale mineral counters and quiet integrated appliance panels.
The subtle irregularity of fired ceramic makes the cabinetry itself feel like an art installation.
Common Mistake: Use large-format ceramic panels rather than many small tiles, which can make cabinet fronts look too busy.
9. Create a Polished Riviera Look With Lacquer and Frosted Glass
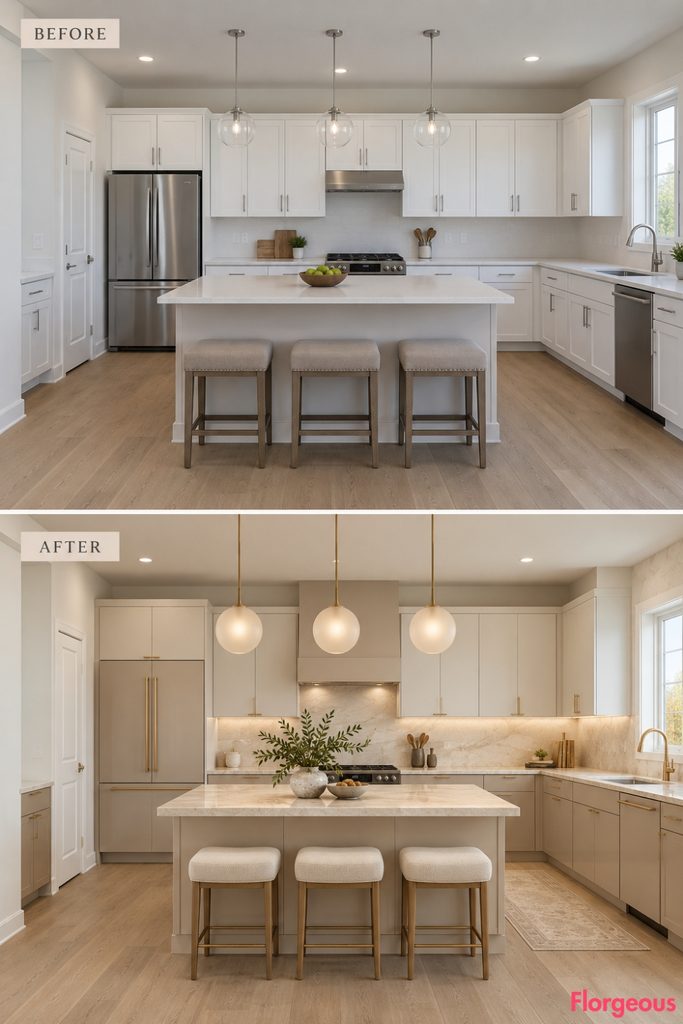
This is the most tailored and glamorous concept in the series.
Before: The kitchen begins with flat neutral finishes, matte generic counters, exposed appliances, basic hardware, ordinary island cabinetry, and simple lights.
After: Finish the lower cabinetry in muted pearl-sand soft-gloss lacquer while giving the upper cabinets a contrasting matte chalk finish. Introduce thin champagne-metal edge pulls, creamy honed stone, integrated refrigeration, and sculptural frosted-glass fixtures.
The difference between glossy lower surfaces and powdery matte uppers makes the room feel designed at an architectural level.
Style Note: Keep the lacquer sheen controlled. High mirror gloss would feel too flashy for this concept.
10. Add Atlantic Drama With an Oxidized Copper Splashback
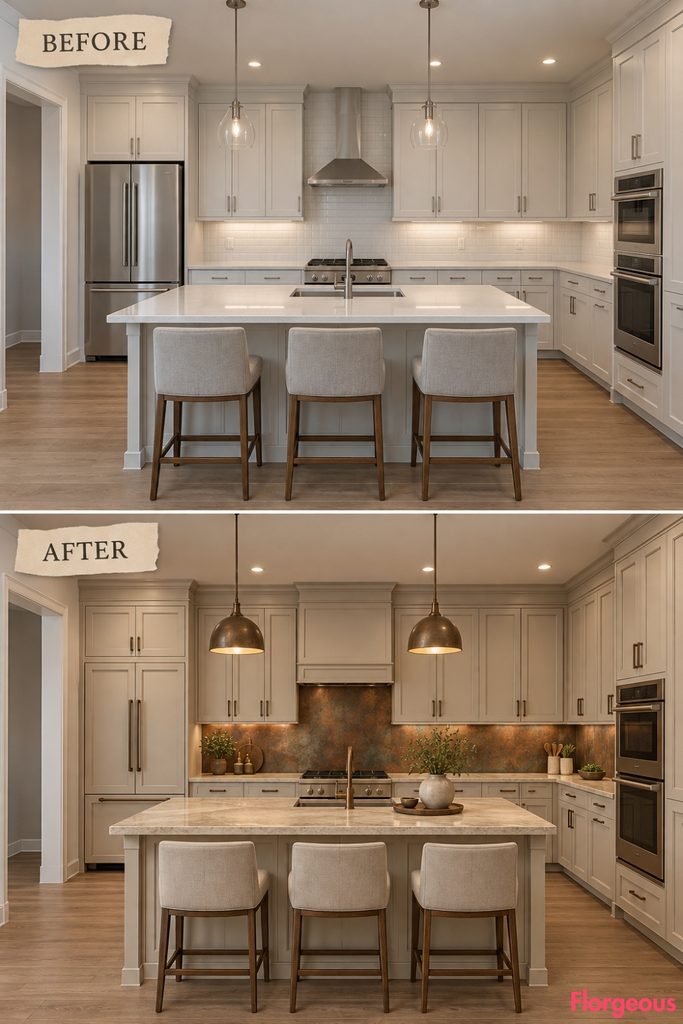
This makeover takes the coastal palette in a moodier direction.
Before: The room starts with the same neutral cabinets, plain backsplash, generic counters, visible appliances, standard island, and simple ceiling fixtures.
After: Replace the existing backsplash finish with large continuous oxidized copper sheets showing smoky brown, muted teal, and deep mineral-green patina. Pair them with substantial oyster-colored cabinetry, pale stone counters, darkened bronze hardware, and matching refrigerator panels.
The room feels atmospheric and weathered, but not nautical.
Designer Tip: Seal the copper if you want to slow further patina changes.
11. Create a Luminous Backsplash With Frosted Glass Blocks
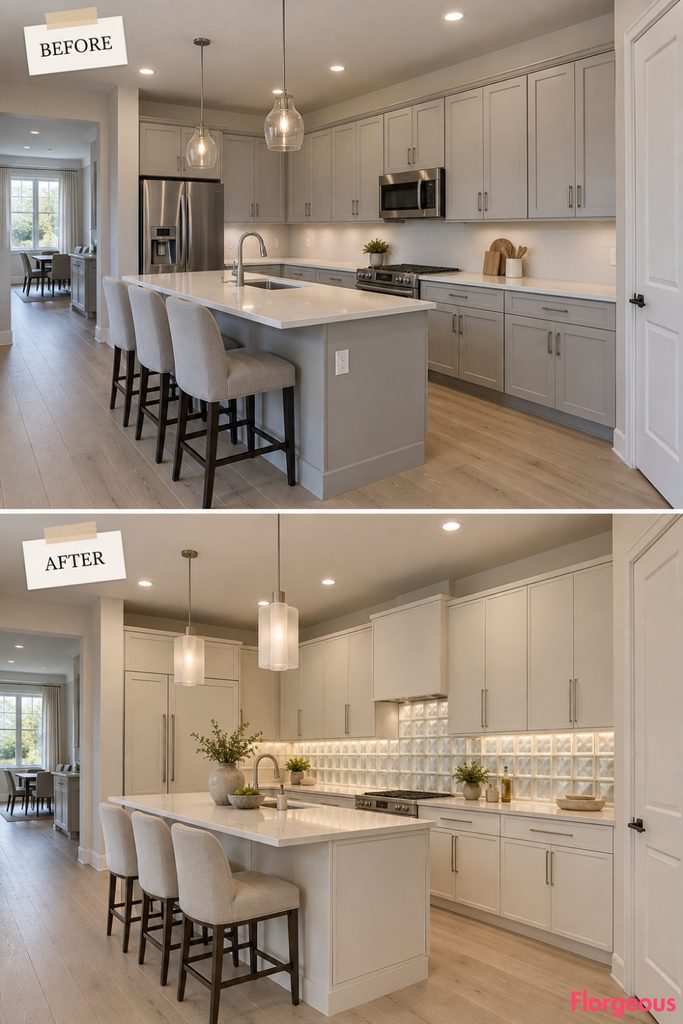
This transformation is driven by light rather than a strong color.
Before: The original kitchen has a flat conventional backsplash, neutral cabinetry, basic countertops, standard appliances, plain island treatment, and ordinary lighting.
After: Introduce a tightly composed field of small frosted glass blocks across one existing backsplash wall as a non-structural decorative surface. Pair it with matte alabaster cabinetry, pale counters, brushed chrome details, integrated refrigeration, and carefully concealed low-level lighting that washes the glass.
The translucent surface adds depth and movement while remaining abstract and contemporary.
Why It Works: The glass responds to changing daylight, giving the kitchen a subtle watery quality.
12. Make Directional Wood Grain the Main Graphic Feature
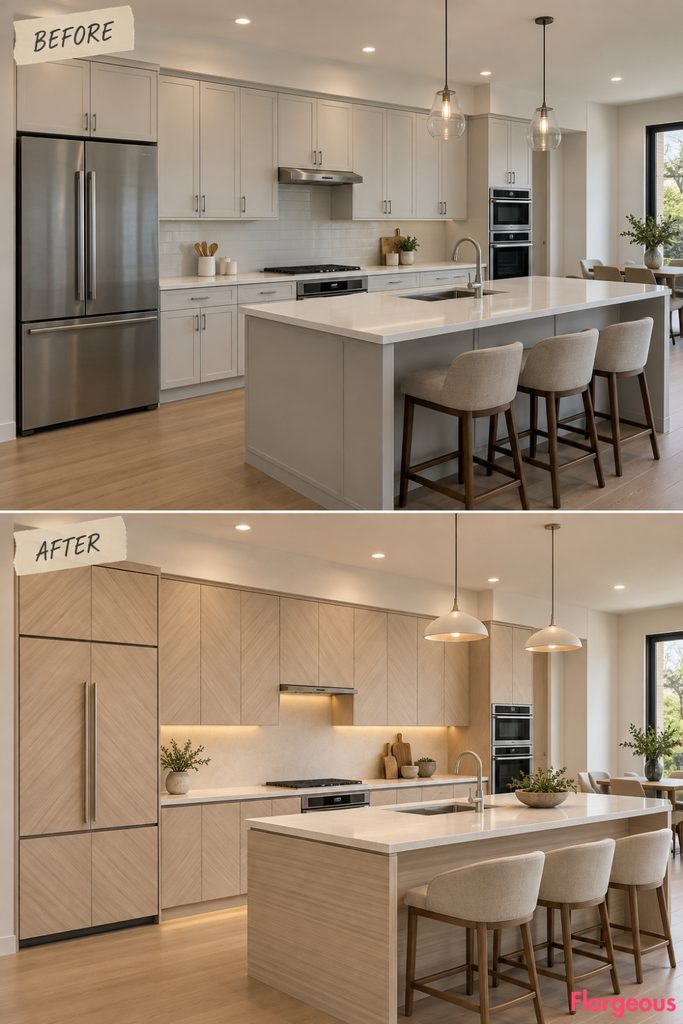
This concept creates pattern without tile, wallpaper, or ornament.
Before: The kitchen starts with generic neutral cabinet fronts, plain counters, visible appliances, standard handles, a conventional island, and basic lighting.
After: Redesign the cabinetry in bleached ash veneer, carefully aligning diagonal grain across entire banks of doors and drawers. On the existing island, switch the grain direction to horizontal while keeping the exact footprint unchanged. Add slim recessed pull channels, warm-white counters, integrated appliances, and chalky walls.
The cabinetry now reads almost like a large piece of crafted furniture.
Try This: Grain-matched veneer is especially effective on broad uninterrupted cabinet runs where the pattern can continue clearly.
13. Create a Floating Shadow-Line Kitchen Without Changing the Footprint
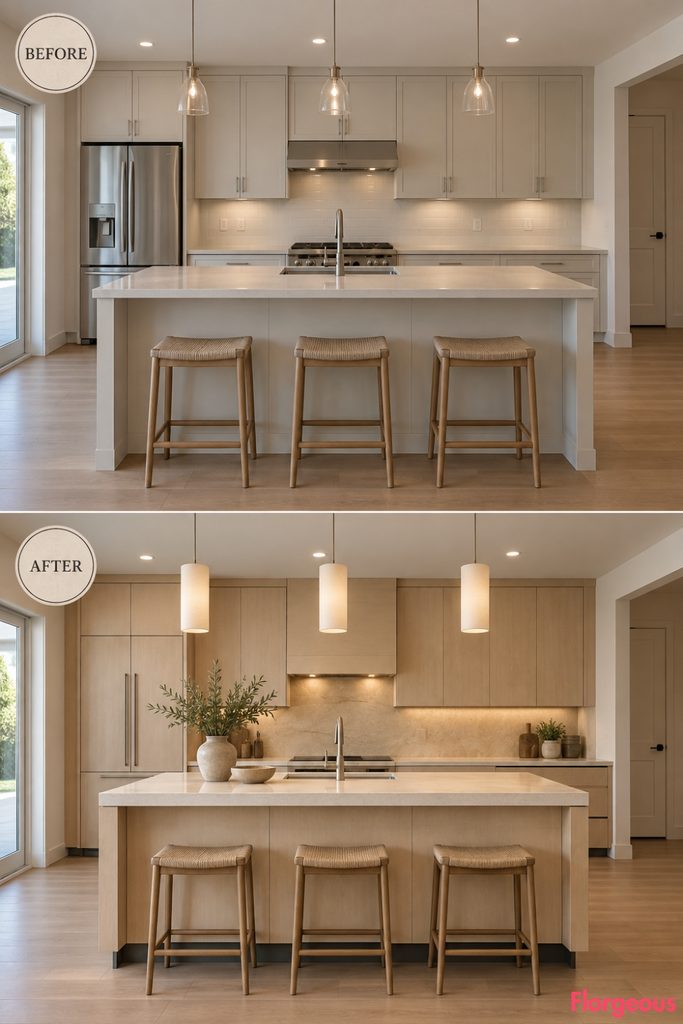
The final makeover changes the visual weight of the cabinetry while keeping the plan completely intact.
Before: The same builder-grade kitchen has conventional toe kicks, basic neutral doors, ordinary counters, exposed appliances, a standard island, and plain lighting.
After: Deeply recess the cabinet plinths and finish them in dark graphite so the cabinetry appears to float above the floor from standing height. Repeat the same shadow line around the existing island base without moving or resizing it. Add substantial pale maple fronts, thick cream counters, continuous concealed finger channels, integrated appliances, and soft cylindrical lights.
The room keeps the same physical footprint but gains a completely different silhouette.
How to Choose a Coastal Look Without Making the Kitchen Feel Themed
A successful Coastal Kitchen does not need several seaside references competing for attention. The strongest designs usually begin with one clear material, architectural move, or piece of craftsmanship and let quieter finishes support it.
That focal decision could be patinated zinc, glazed lava stone, perforated bronze, linoleum joinery, curved cabinetry, porcelain enamel, stoneware fronts, oxidized copper, frosted glass, directional veneer, or a carefully engineered shadow line.
Before renovating, photograph your kitchen from several natural standing viewpoints and identify which surfaces dominate the room. Those areas are often where a distinctive material will create the biggest visual change.
Then keep the practical framework intact wherever it already works. Preserving walls, windows, doors, plumbing, appliance positions, circulation, and the island footprint can still produce a dramatic makeover when cabinetry construction, materials, lighting, hardware, and visual hierarchy are redesigned with purpose.