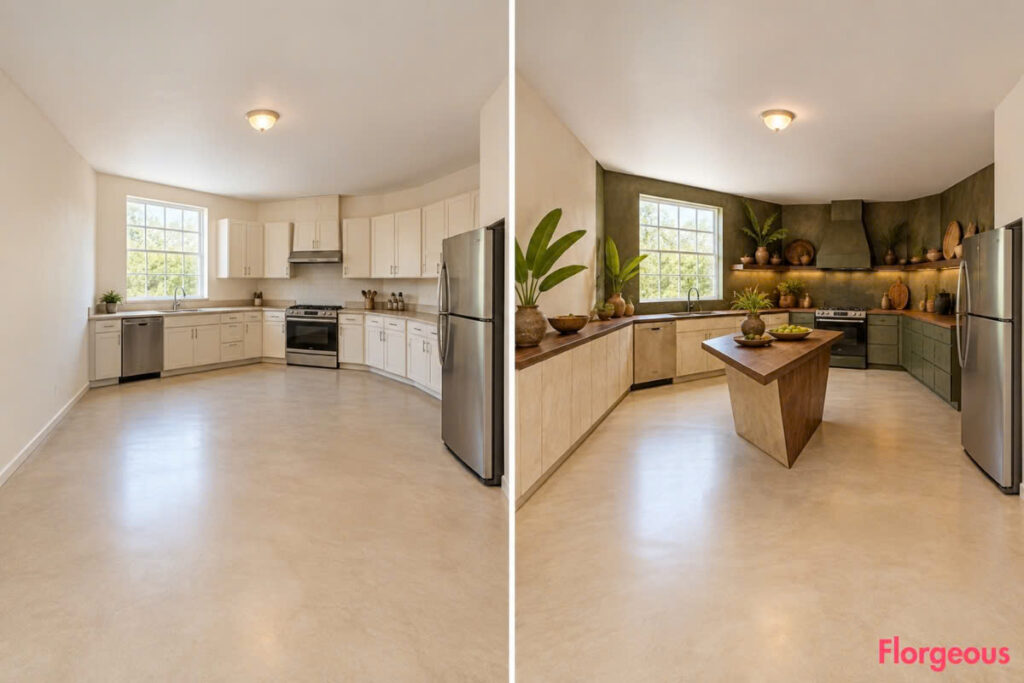
Some builder-grade kitchens feel forgettable before you even notice what is wrong. Standard pale cabinets line the walls, the counters are thin and neutral, the lighting is flat, and every surface seems to follow the safest possible solution.
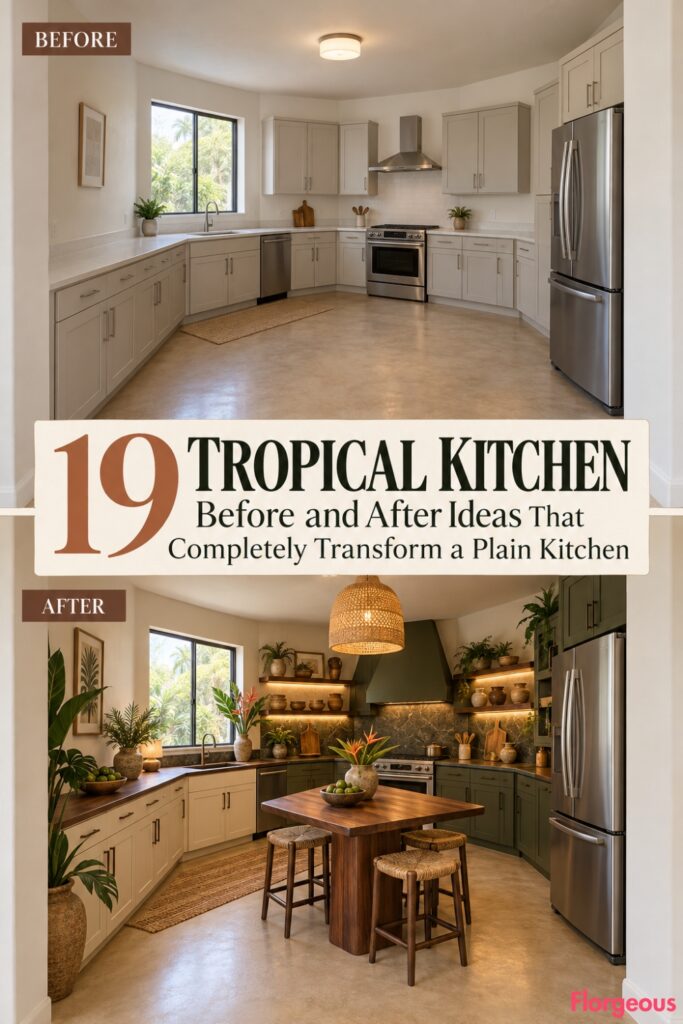
For these 19 Tropical Kitchen transformations, we are starting with a much less conventional room than the typical rectangular or L-shaped kitchen. The same BEFORE appears in every idea: a five-sided pentagonal kitchen with a wide open entry centered on the front wall, one long solid left wall, a tall square window above the fixed sink toward the rear-left, an angled rear wall containing the fixed cooking service, a short solid right wall holding the refrigerator near the front-right, a flat white ceiling, warm beige microcement flooring, basic pale cabinetry, standard appliances, and a completely open center.
Every AFTER keeps that pentagonal architecture, window, doorway, ceiling, flooring footprint, plumbing point, cooking service, refrigerator position, and daylight direction unchanged. What changes radically is how the kitchen is planned inside that shell. Each idea uses a different circulation strategy, cabinet configuration, work surface geometry, focal point, material system, lighting approach, and tropical mood.
1. Follow the Angled Wall With a Rainforest Wedge Plan
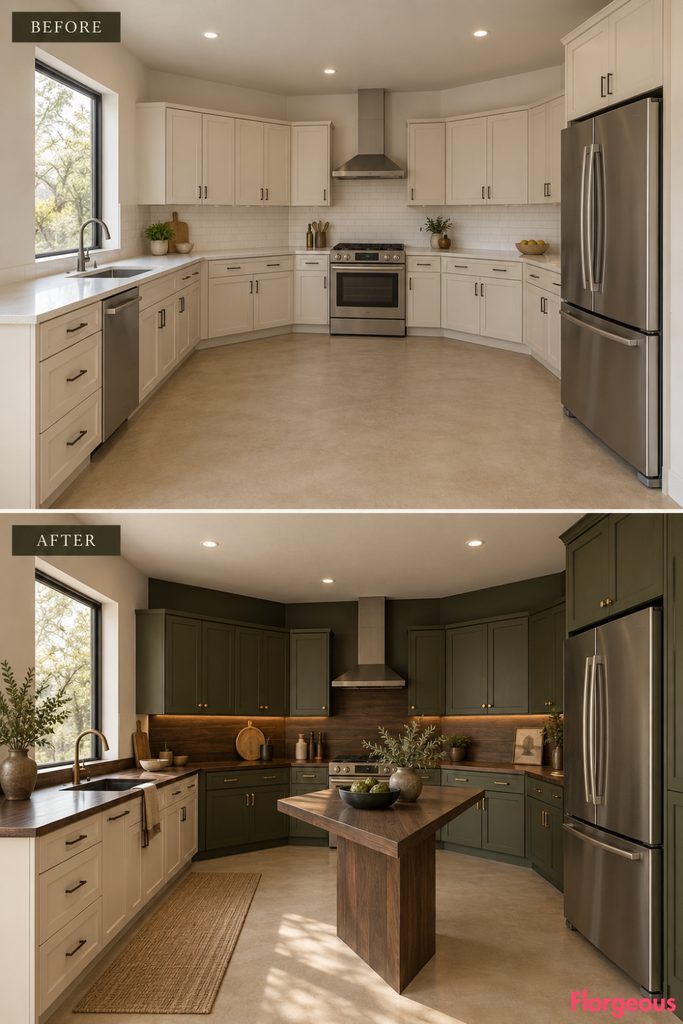
The unusual rear wall becomes the starting point rather than something cabinetry tries to disguise.
Before: Pale cabinets sit awkwardly against the angled cooking wall, while the open center feels accidental.
After: Rebuild the cooking zone as a broad forest-clay cabinet composition that precisely follows the rear angle. Add a compact triangular preparation table in the open center, aligned with that same diagonal rather than the front wall. Pale shell-lime surfaces around the sink and a dark palmwood worktop complete the room.
Why it works: Repeating the architecture’s strongest angle makes the entire pentagonal shell feel intentional.
Try this: Keep generous clearance around all three sides of the triangular worktable.
2. Create a Breezy Split-Galley Resort Kitchen
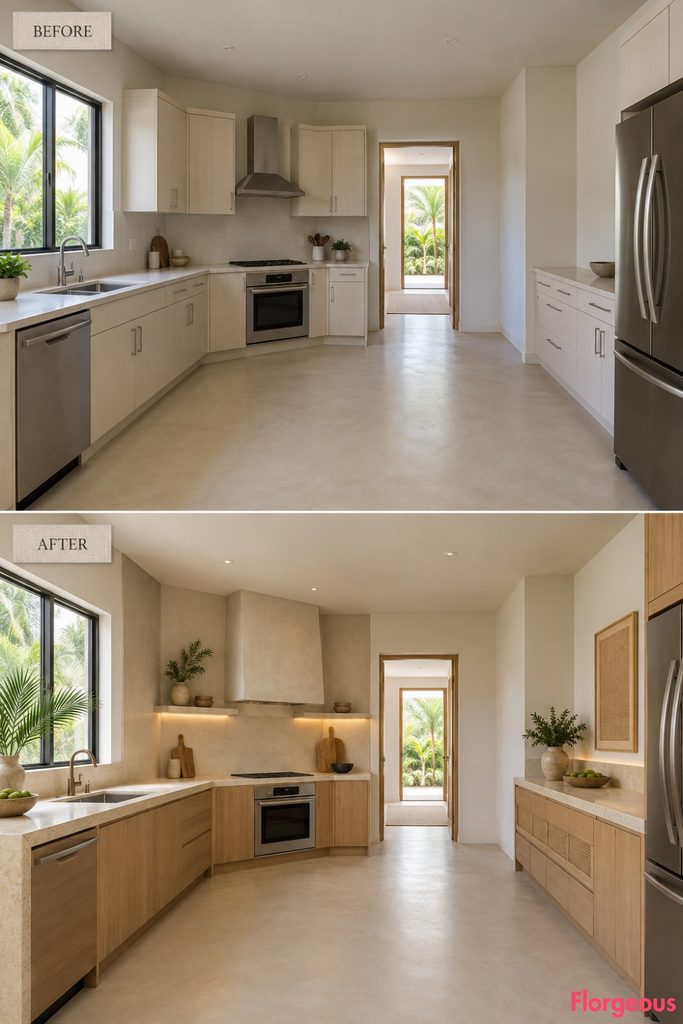
Instead of filling every perimeter wall, this plan creates two clearly separated working bands.
Before: The original cabinetry gathers mostly around the sink and angled rear wall.
After: Extend a low preparation run along the solid right wall, stopping before the fixed refrigerator, while rebuilding the left sink wall as a second independent work zone. Leave the angled cooking wall visually lighter with a deep mineral backsplash and minimal storage.
Warm bleached hardwood, cream limestone, and woven-abaca accents make the room feel like a calm resort kitchen.
Why it works: Two parallel working zones create stronger spatial order while maintaining a clear central passage.
3. Turn the Window Wall Into a Tropical Veranda Bench
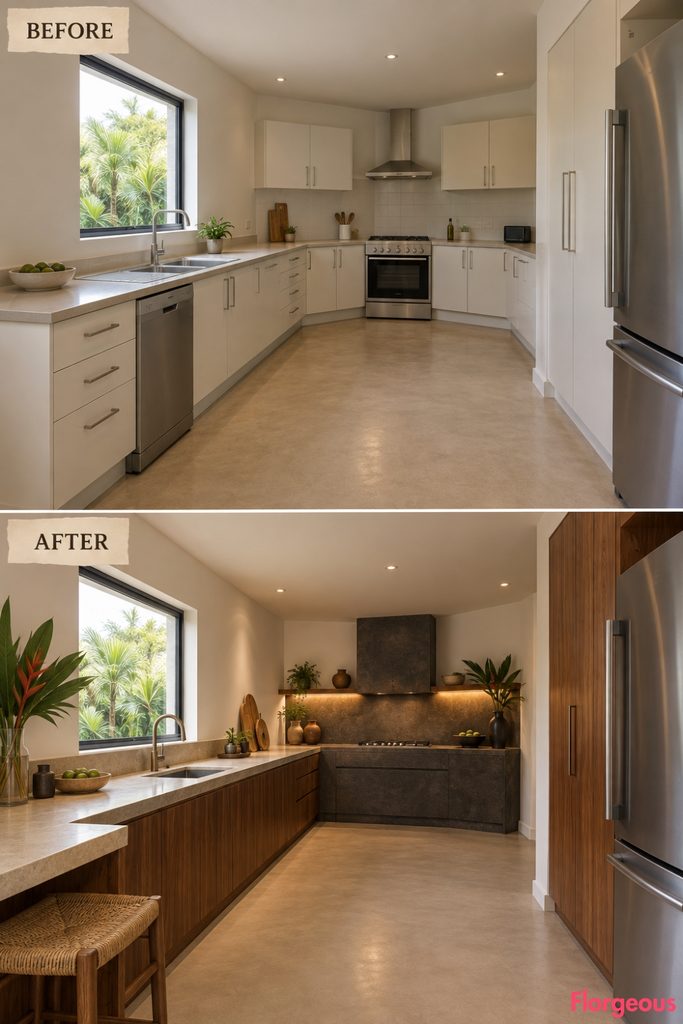
This makeover gives the sink side a furniture-like identity.
Before: The tall square window sits above a conventional sink cabinet.
After: Build one long, extra-deep window-side workbench running most of the left wall. The fixed sink remains beneath the window, but the bench continues toward the entry as a lower casual perch at one end.
Across the room, the cooking wall becomes a compact dark mineral block with almost no upper storage.
Why it works: One continuous bench gives the irregular room a long calm horizontal line.
Try this: Keep the seating end visually distinct from the food-preparation surface through a subtle height change.
4. Fold the Worktop Through the Room Like a Monsoon Ribbon
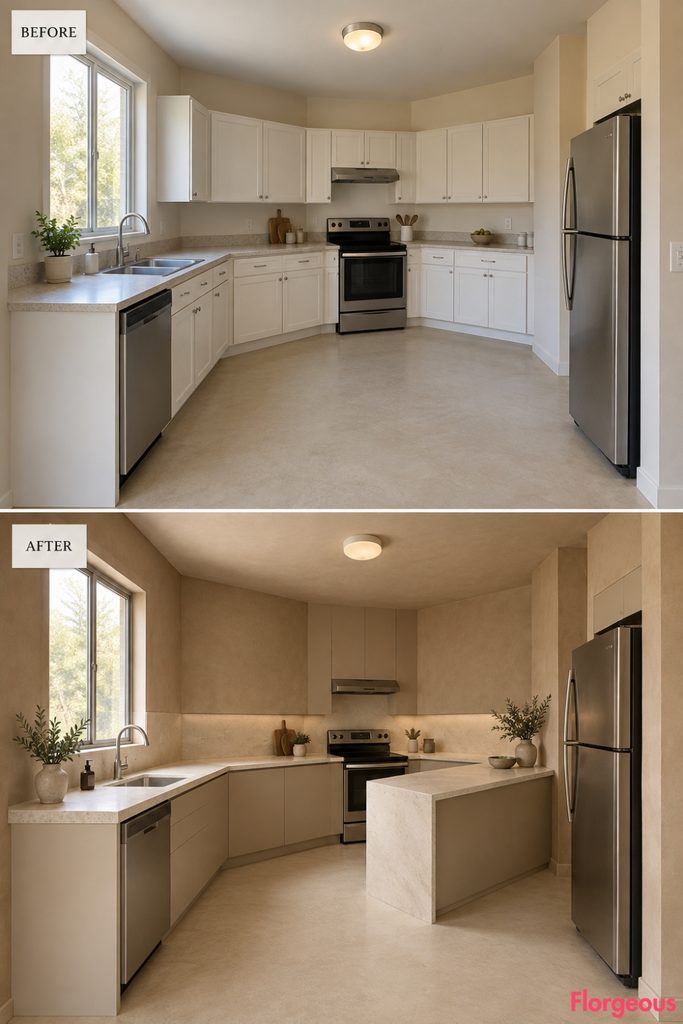
Here, the preparation surface changes direction several times within one continuous composition.
Before: Conventional straight counters ignore the room’s unusual geometry.
After: Create a broad folded worktop that begins beneath the left window, turns across the rear cooking zone, then projects a short angled preparation wing back into the room before terminating well clear of the entry.
Matte sand cabinetry below the folded surface keeps the shape readable, while warm red-brown clay plaster adds depth.
Why it works: The changing direction responds to the pentagonal shell without adding a conventional island.
5. Break the Kitchen Into an Archipelago of Furniture Pieces
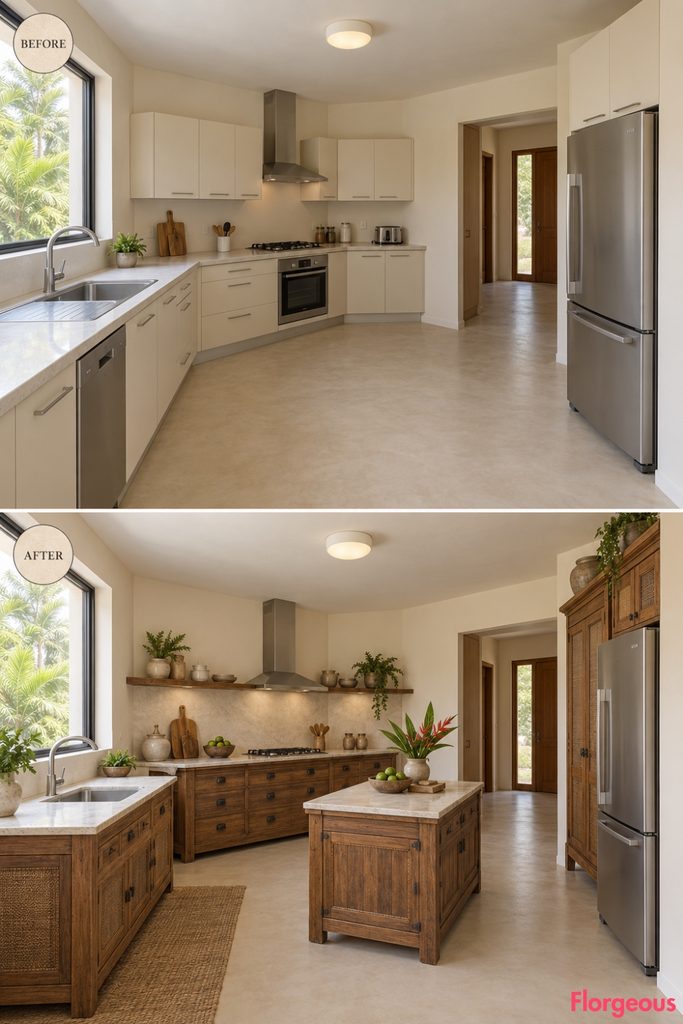
This is the opposite of a continuous fitted kitchen.
Before: Pale cabinetry reads as one generic built-in perimeter.
After: Separate the functions into distinct furniture-like pieces: a freestanding wash cabinet beneath the fixed sink window, a broad cooking chest on the angled wall, a tall dry-goods cupboard beside the refrigerator, and a low movable prep chest near the center.
All four pieces use related tropical materials but different silhouettes.
Why it works: Negative space between the components makes the unusual room shape much more visible.
Try this: Repeat one material, such as dark wood handles, across every piece to keep the composition connected.
6. Build a Tropical Laboratory Along One Side
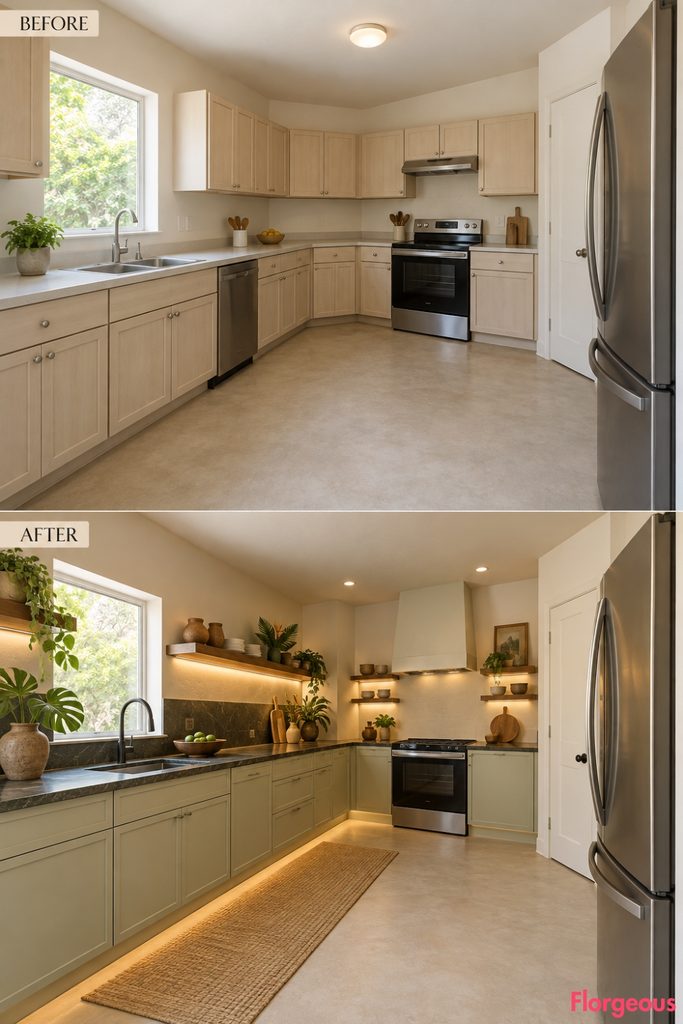
This makeover deliberately leaves most of the pentagonal footprint almost empty.
Before: Basic cabinetry is scattered around several walls.
After: Concentrate most new storage and preparation cabinetry on the long left wall, integrating the fixed sink into one highly organized linear work zone. The rear cooking wall becomes a compact independent station, while the right side remains visually open except for the refrigerator.
Dark mineral counters, pale lime cabinetry, and precise lighting create a tropical laboratory feeling softened by natural fibers and timber utensils.
Why it works: Concentrating functions on one side makes the room feel larger and more architectural.
7. Add a Diagonal Preparation Dock
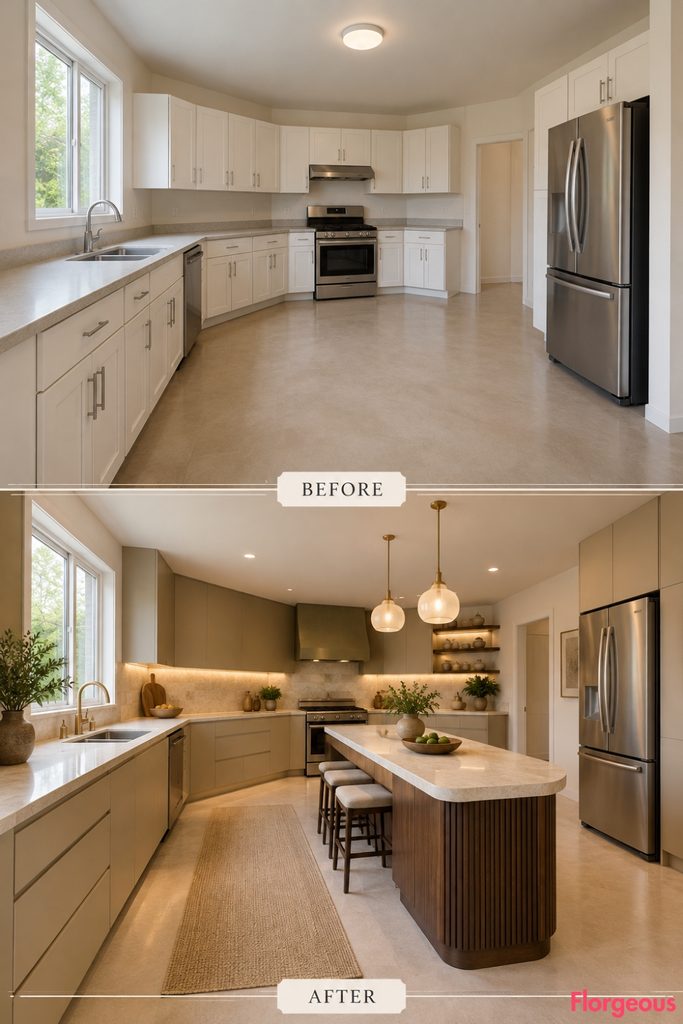
Instead of an island parallel to the room, this preparation surface deliberately aligns with the angled rear wall.
Before: The middle of the kitchen is completely unused.
After: Introduce one long, narrow preparation dock set diagonally through the center. One end points toward the fixed cooking zone while the other stops short of the entry.
Keep the perimeter cabinetry low and quiet in pale mineral finishes so the diagonal dock defines the room.
Why it works: Its orientation reinforces the unusual geometry and creates a completely different circulation pattern.
8. Create a Three-Piece Jungle Atelier
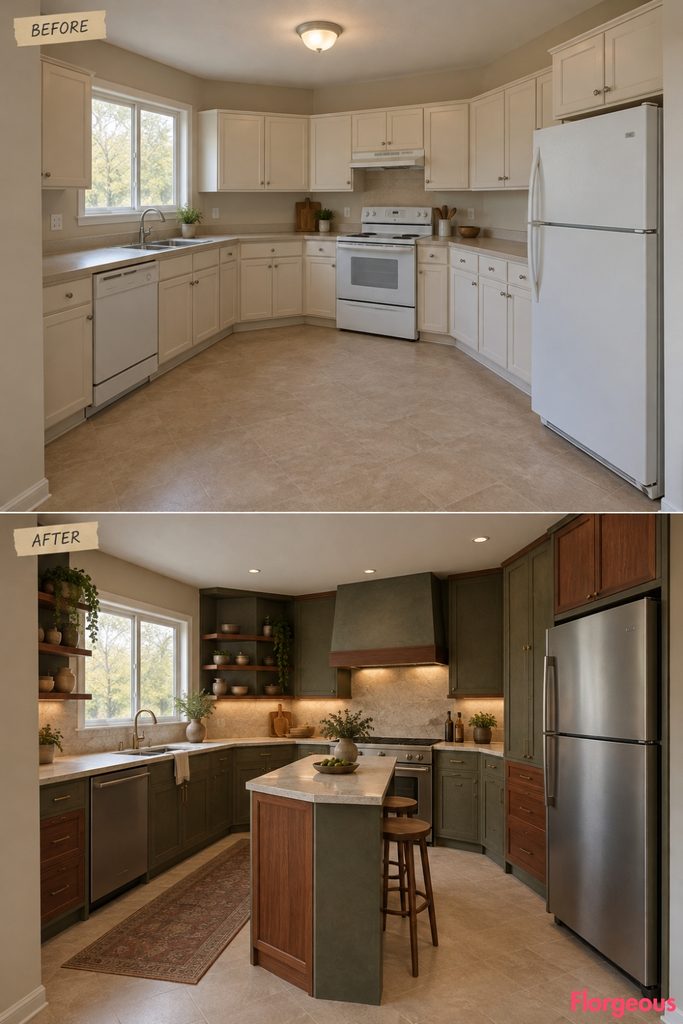
This concept uses three substantial work blocks rather than one perimeter or one island.
Before: Standard fitted cabinets make every function visually similar.
After: Organize the room around three independent rectangular blocks: the existing sink becomes a left-wall wash block, the rear cooking zone becomes a deep cook block, and a new narrow prep block sits closer to the center but offset toward the right.
Deep olive mineral plaster, reddish tropical timber, and pale stone make each block distinct while remaining part of one composition.
Why it works: Each kitchen function becomes legible as its own architectural object.
9. Open the Center With a Butterfly Layout
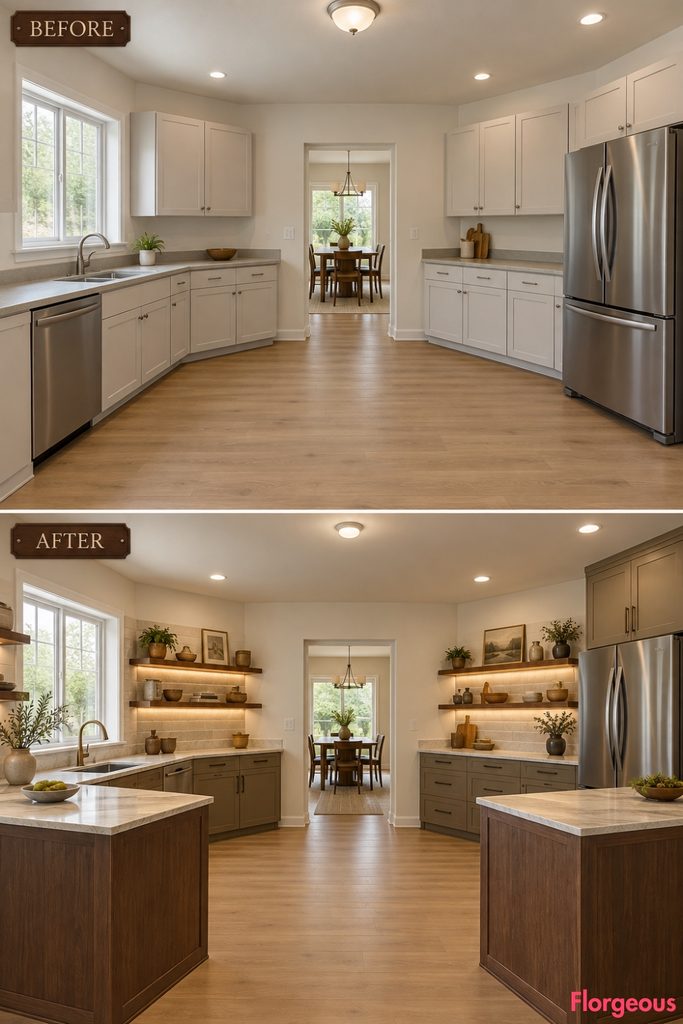
This arrangement intentionally spreads outward rather than filling the middle.
Before: The perimeter feels passive and the center feels leftover.
After: Extend one low preparation wing from the left sink wall toward the front-left and a second dry-prep wing from the right wall toward the rear-right, leaving a large diamond-shaped open circulation area between them.
The fixed cooking zone remains centered on the angled rear wall.
Why it works: Two outward-facing wings give the room movement while preserving an unusually generous center.
10. Build a Low Window Kitchen With No Upper Cabinets
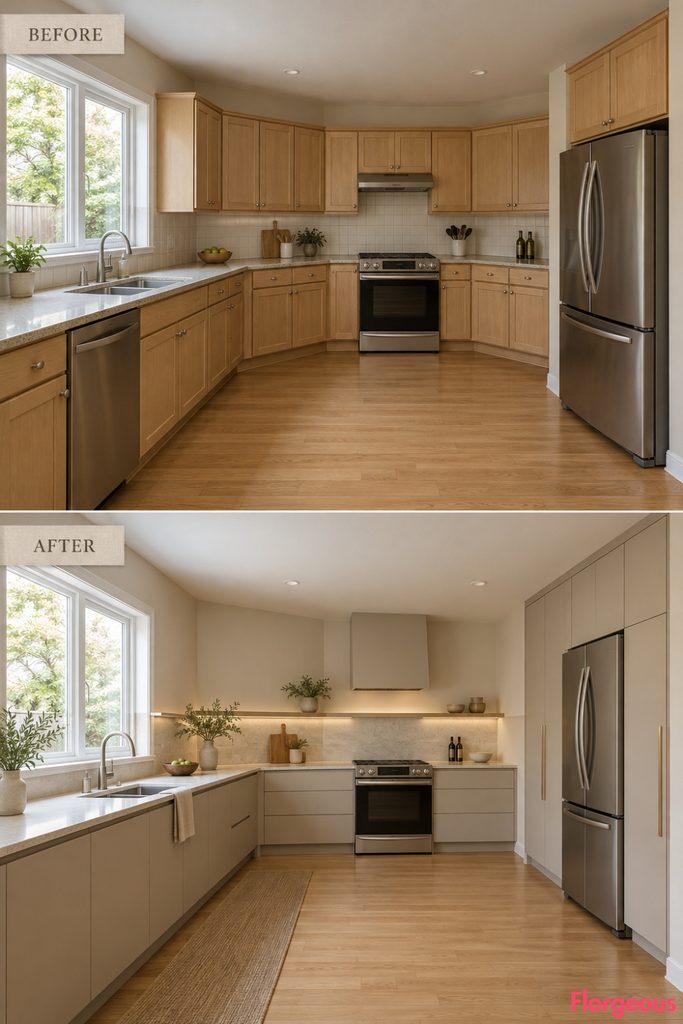
This transformation uses absence as the main planning idea.
Before: Basic upper and lower cabinets visually crowd the sink wall.
After: Remove all conventional upper storage and run a continuous low work surface beneath and beyond the square window. Move dry storage into full-height cabinetry along the short right wall around the fixed refrigerator, while the angled cooking wall receives only a shallow counter and concealed extraction.
Why it works: Storage moves away from the daylight wall, making the window side feel open and almost pavilion-like.
11. Introduce a Diamond-Shaped Volcanic Prep Table
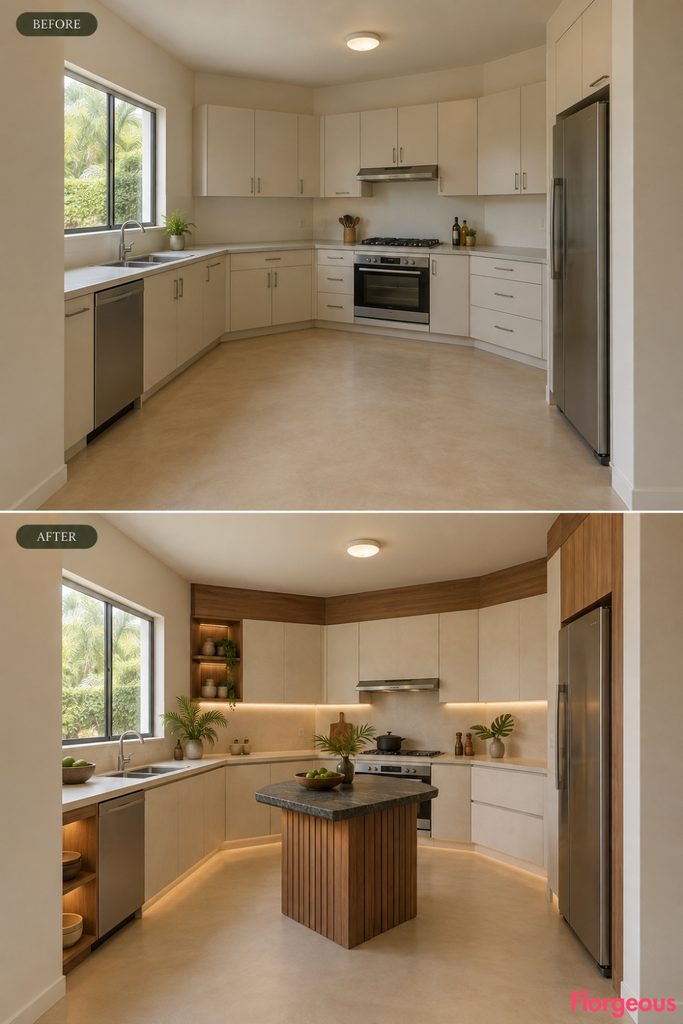
This plan uses the pentagonal room to support an equally geometric central form.
Before: The open center lacks purpose.
After: Place a compact diamond-shaped prep table in the center, rotated so one point faces the cooking wall and the opposite point faces the entry. Keep the perimeter in chalky off-white plaster cabinetry, then use a deep volcanic stone surface on the diamond.
Why it works: The geometry reads immediately, but the table remains compact enough to preserve circulation.
12. Add an Offset Social Bar Without Making It an Island
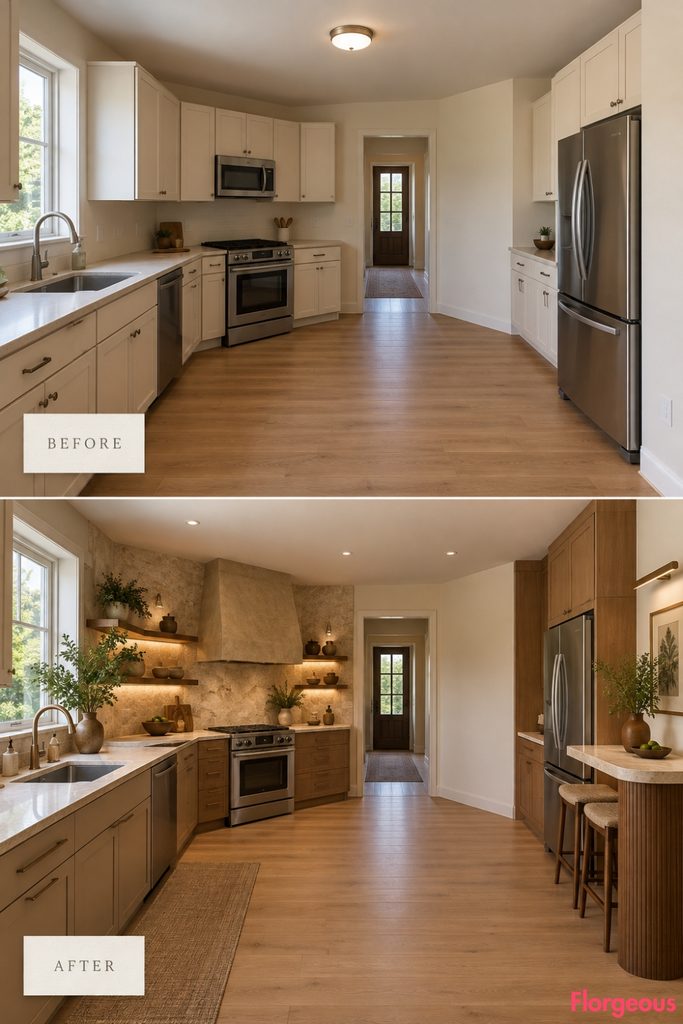
This kitchen shifts the social function toward the entry.
Before: The front portion of the room is simply empty floor.
After: Extend a narrow bar from the short right wall beside the refrigerator, but stop it well before the center so it reads as a sidecar rather than a peninsula crossing the room.
The sink and cooking zones remain fully independent behind it.
Why it works: The bar creates a social edge near the entry while preserving the center as circulation.
13. Wrap the Pentagonal Shell With a Continuous Low Perimeter
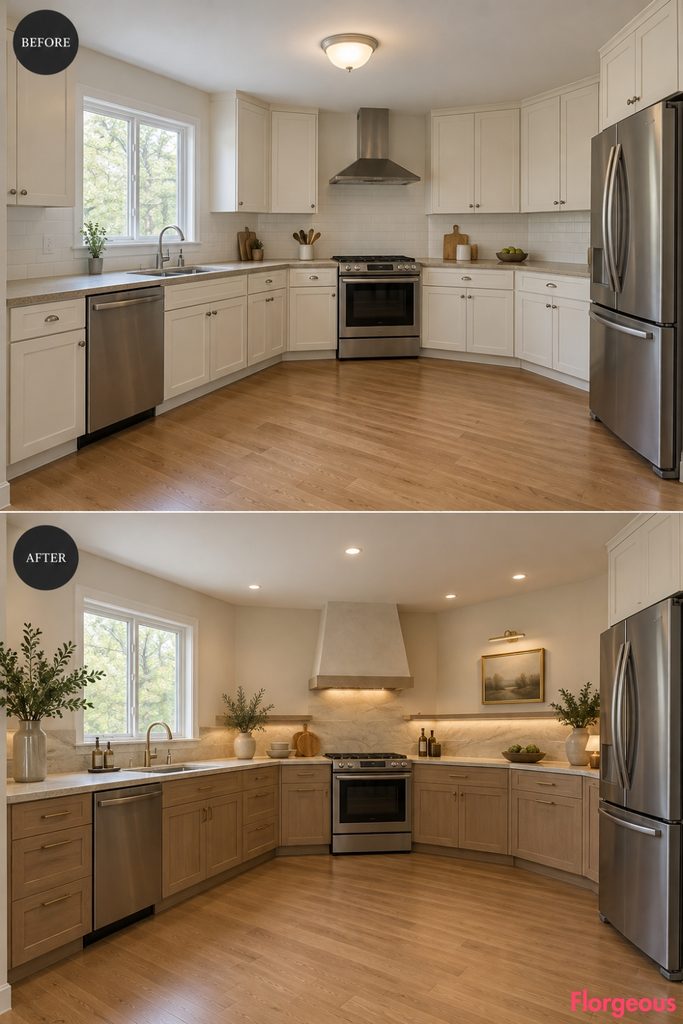
This is the only concept where the geometry of the room itself becomes the full layout.
Before: Separate cabinet runs make the unusual five-sided footprint feel accidental.
After: Create one continuous low cabinet and counter ribbon that follows every usable perimeter plane from the left sink wall, across the angled cooking wall, and onto the right side before the refrigerator.
There are no upper cabinets and no center furniture.
Why it works: The eye finally reads the entire pentagonal footprint as one intentional shape.
14. Give the Kitchen Two Different Working Heights
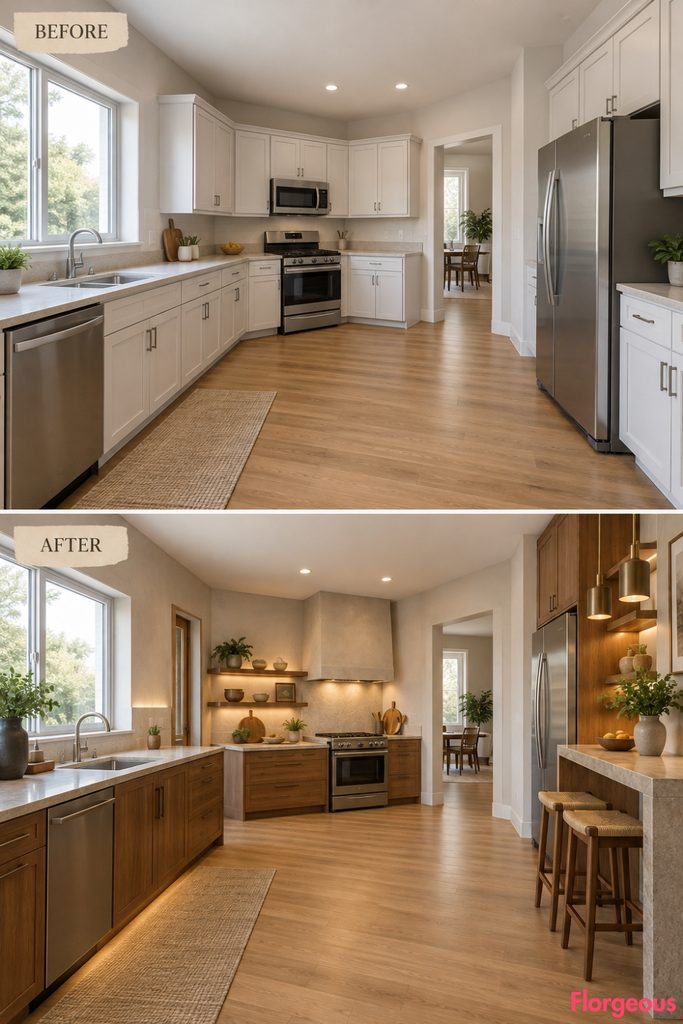
This layout is driven by ergonomics as much as appearance.
Before: Every counter sits at the same predictable height.
After: Keep the sink wall at standard working height, create a lower pastry and prep surface along part of the angled rear wall, and add a taller narrow standing counter against the right wall.
The three levels are unified through one tropical mineral palette.
Why it works: Changing work heights creates distinct functional zones without changing the shell.
15. Center the Room Around a Tropical Supper Table
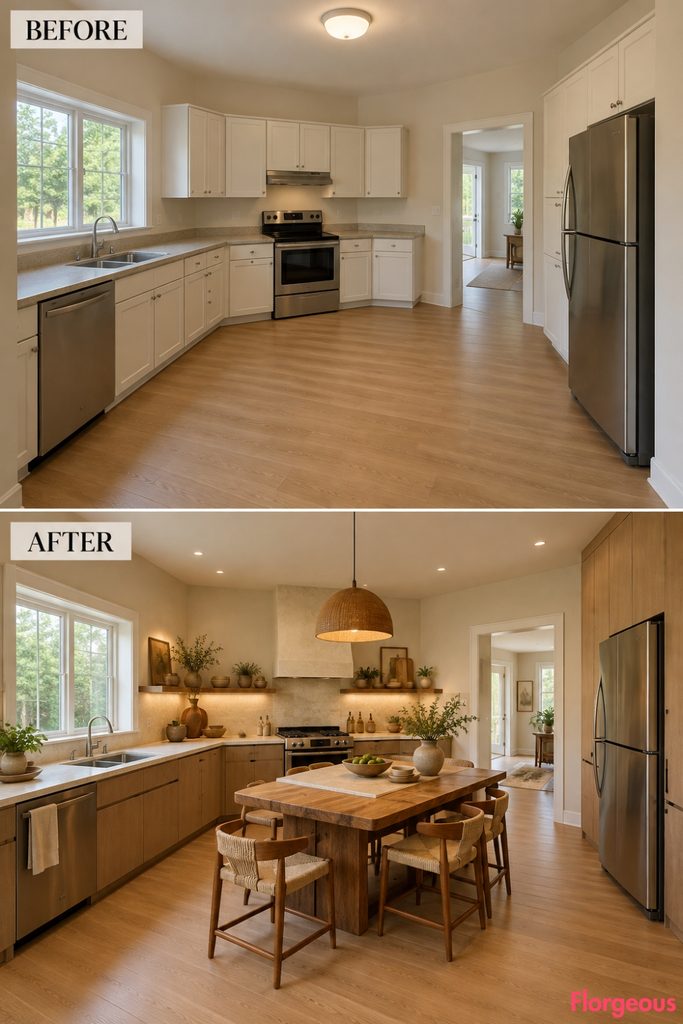
Here, the kitchen feels more like a shared cooking room than a fitted workspace.
Before: The center is empty and the perimeter is purely functional.
After: Simplify the perimeter into quiet low cabinetry, then place one substantial rectangular supper table slightly off-center, rotated to respect the angled rear wall rather than the front entry.
The table doubles as prep space and casual dining.
Why it works: A furniture-first layout creates a relaxed tropical home atmosphere that feels completely different from a conventional island kitchen.
16. Create a Zigzag Working Line Across Two Walls
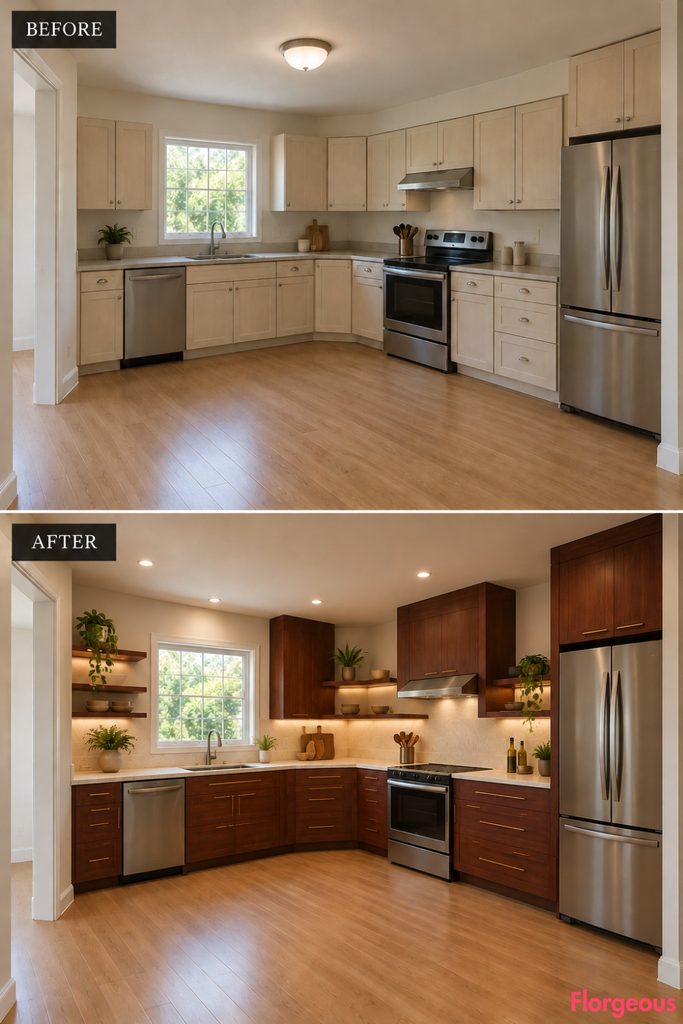
The counter geometry becomes intentionally broken rather than continuous.
Before: Straight cabinet runs feel ordinary inside the irregular shell.
After: Build three connected counter segments that shift direction between the left sink wall and angled cooking wall, producing a controlled zigzag working line while remaining entirely against the perimeter.
Dark red-brown timber alternates with pale mineral surfaces at each change of direction.
Why it works: The work line responds to the room geometry without adding center furniture.
17. Dock a Compact Prep Block Into the Clipped Rear Corner
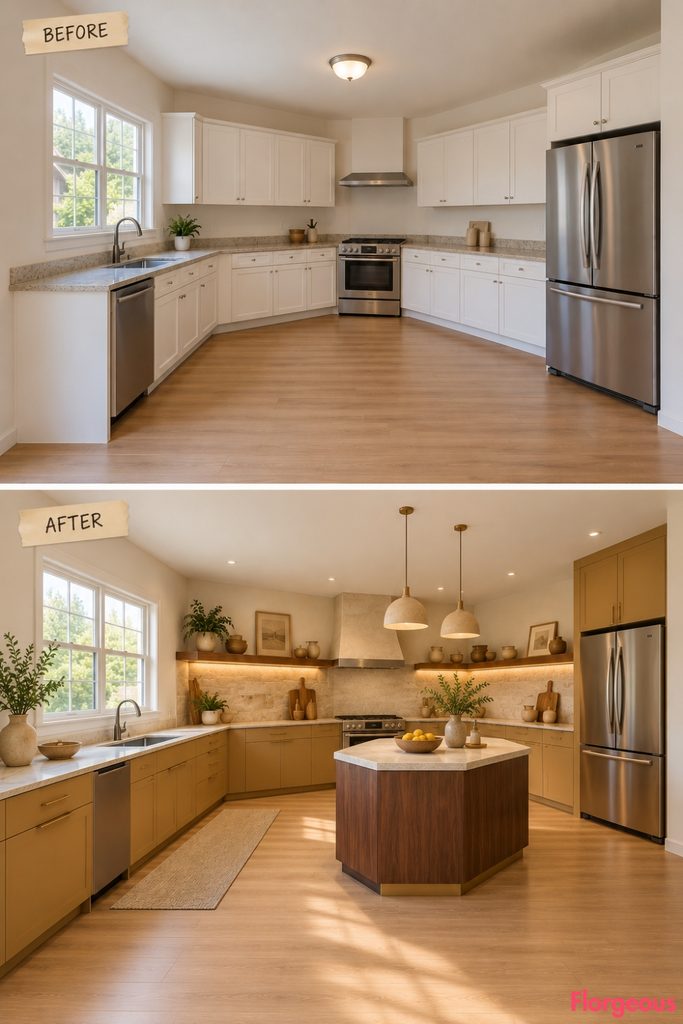
This concept uses the most awkward part of the pentagon as its strongest feature.
Before: The transition between the rear cooking wall and short right wall feels unresolved.
After: Insert one compact polygonal prep block into that clipped rear-right zone, visually connected to the cooking area but accessible from three sides. The left sink wall becomes a long quiet wash zone, while dry storage remains near the refrigerator.
Why it works: It turns leftover geometry into a deliberate work node.
18. Make a One-Sided Night Tropics Kitchen
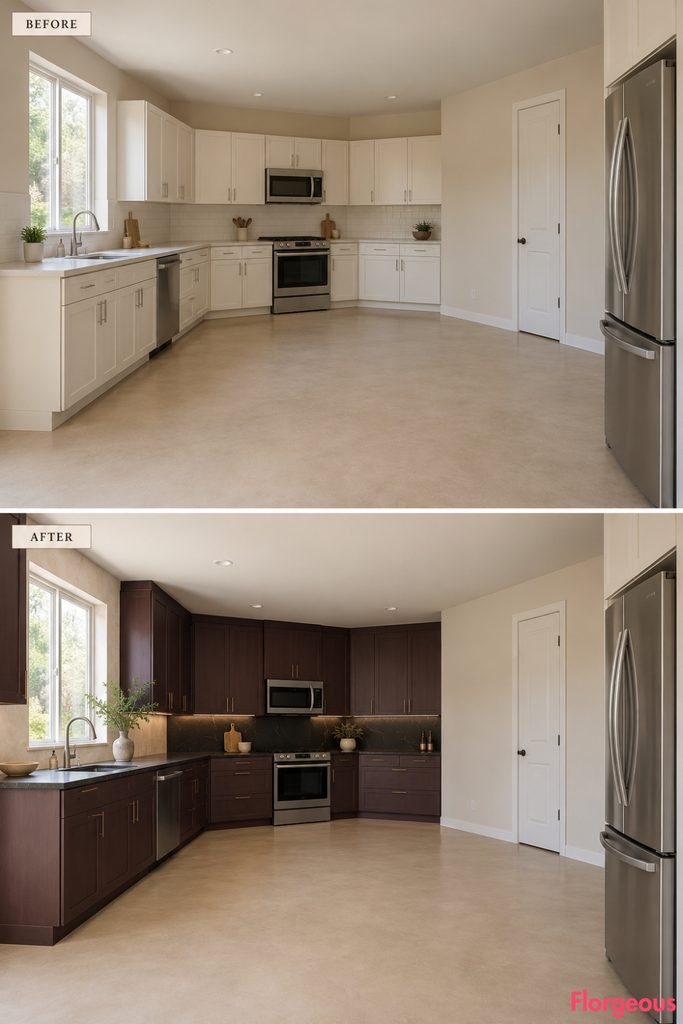
This is the most dramatic asymmetrical layout in the collection.
Before: Storage and work surfaces occupy several sides of the room evenly.
After: Visually concentrate almost everything on the left and rear walls, using deep aubergine-brown cabinetry, black mineral work surfaces, and a luminous pale sink surround. Keep the entire right half, except for the fixed refrigerator, almost empty.
The result feels spacious, dark, and intentionally off-balance.
Why it works: Extreme asymmetry makes the pentagonal footprint feel much larger than the original fitted layout.
19. Finish With a Tropical Material Constellation
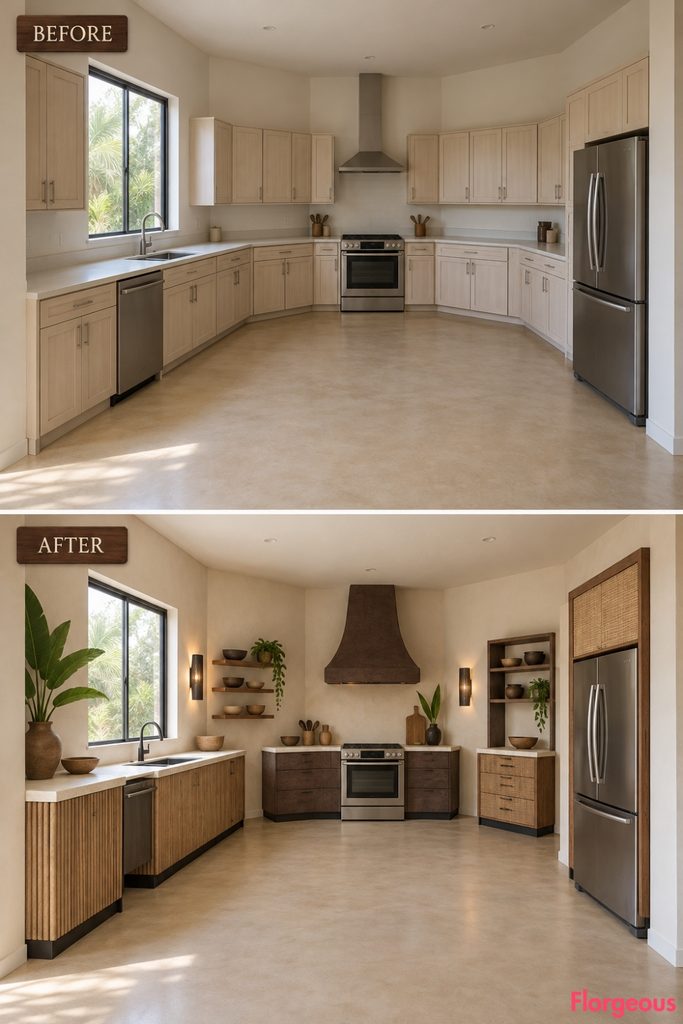
The final concept has no single continuous cabinet run at all.
Before: Ordinary pale cabinetry reads as one generic fitted system.
After: Organize the room as a constellation of five separate storage and work volumes, each positioned along the existing walls rather than forming continuous cabinetry. One contains the sink, one surrounds the cooking service, one sits beside the refrigerator, and two provide prep and dry storage.
Each volume uses a different tropical material family, but they share the same pale stone work surface height and slim dark base line.
Why it works: The pentagonal architecture stays fully visible between the pieces, making the kitchen feel curated rather than fitted.
How to Choose the Right Tropical Kitchen Layout
A strong Tropical Kitchen makeover should change more than color. Layout determines where the eye travels, how people move through the room, which surface becomes the focal point, and whether the finished kitchen feels architectural or simply decorated.
Start with the room itself. An unusual wall angle, a window, an awkward corner, or an open stretch of floor can become the feature that organizes the new layout. Designing against the architecture often creates awkward filler cabinetry. Designing with it can produce something far more memorable.
If your kitchen is small, perimeter-focused ideas such as the continuous low ribbon, one-sided plan, or window bench can preserve valuable floor space. Larger kitchens can support more sculptural moves such as a triangular prep table, diagonal dock, diamond worktable, supper table, or furniture constellation.
The most successful Tropical Kitchen will also feel practical in daily use. Before changing the internal layout, check appliance clearances, ventilation, plumbing, heat zones, prep distances, storage access, and the width of every circulation route. The visual transformation should be dramatic, but cooking should become easier rather than more complicated.